
JIRA Service Management
Efficiency through automation
Series: JSM, Post # 10
First posted: 2025-02-28
Read time: 7 minutes
Written By: Steven Godson
Greetings!
Automation in JIRA Service Management (JSM) is revolutionising how teams handle their service requests and incident management. By leveraging powerful automation features, organisations can streamline workflows, reduce manual tasks, and improve overall efficiency.
These automation capabilities allow teams to set up rules that trigger actions based on specific conditions, ensuring that repetitive tasks are handled automatically. This not only saves time but also minimises the risk of human error, leading to more consistent and reliable service delivery.
Whether it's automating ticket assignments, sending notifications, or updating issue statuses, JSM’s automation features empower teams to focus on more strategic and value-added activities.
In this article, we will explore the possibilities available in JSM.
Why automate?
Process automation in IT Service Management (ITSM) is a transformative approach that brings numerous advantages to businesses. By automating repetitive and time-consuming tasks, organisations can significantly enhance their operational efficiency.
This means that IT teams can focus on more strategic activities that require human expertise and creativity, rather than getting bogged down by mundane tasks. For instance, automating service desk processes can drastically improve the productivity of IT professionals by automatically assigning service requests to the best-suited IT employee and ensuring that all necessary documentation is stored correctly.
One of the most compelling benefits of IT process automation is the reduction in human errors. Automated processes follow precise instructions and are not susceptible to distractions, ensuring tasks are carried out consistently and accurately. This minimises the risk of costly mistakes and enhances the overall reliability of IT services.
Additionally, automation enables faster and more efficient responses to user requests, which can significantly enhance user satisfaction. Users receive quick and effective responses to their inquiries, leading to a better overall experience.
Moreover, IT process automation can lead to substantial cost savings for businesses. By reducing the need for manual intervention, organisations can lower their operational costs and allocate resources more effectively.
This not only improves the bottom line but also allows businesses to invest in other areas that drive growth and innovation. Furthermore, automation makes it easier to implement process changes and adapt to evolving business needs, providing a flexible and scalable solution for IT management.
What is available?
Project Settings
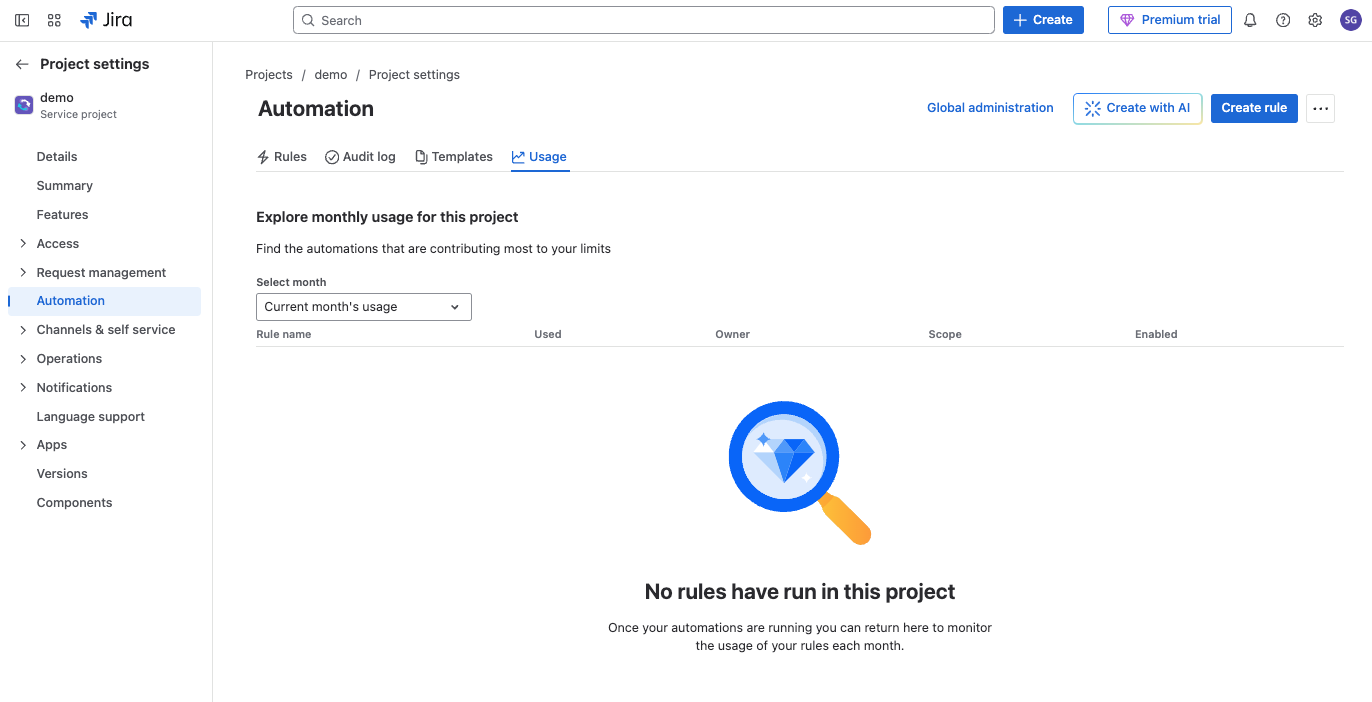
In order to access to automation functionality you need to navigate to Project settings -> Automation. The screen that you will see first is the list of automation templates available to JSM.
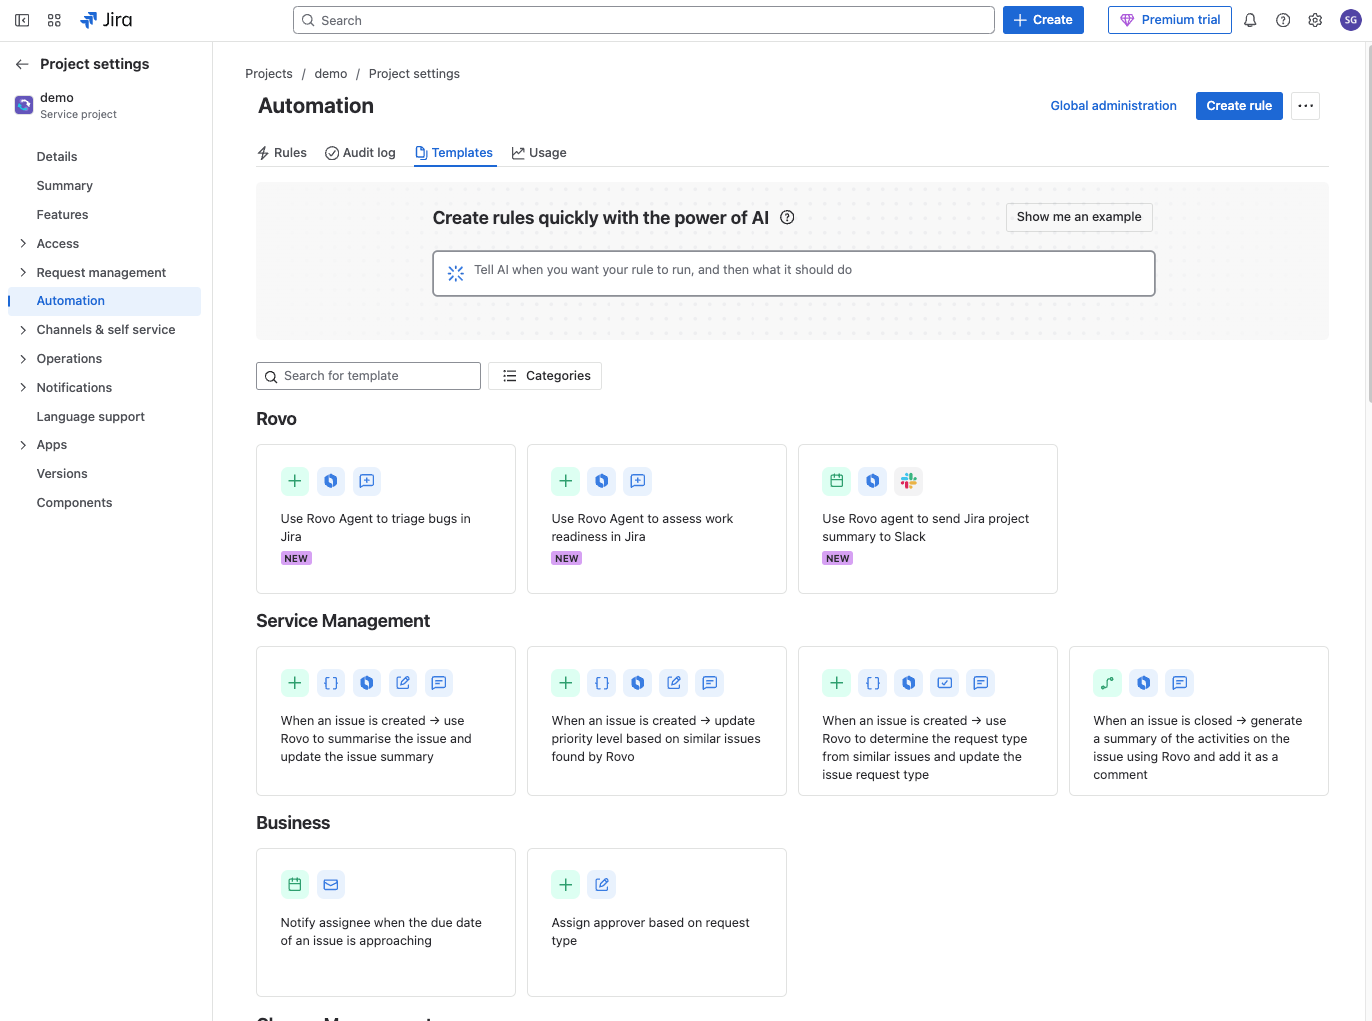
The templates are grouped into areas such as.
- Rovo - Atlassian's AI capability
- Service Management
- Business
- Change Management
- Design
- Human Resources
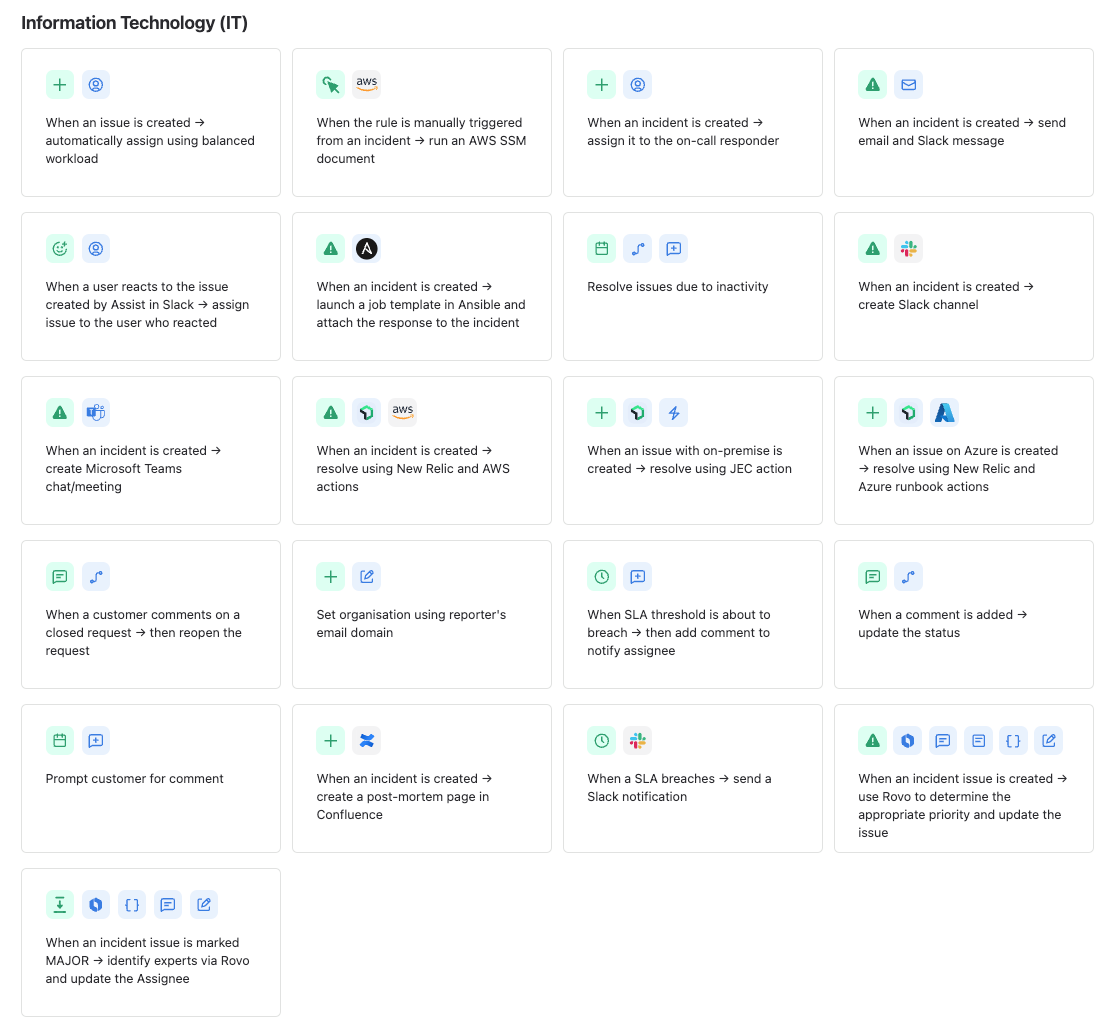
- Information Technology (IT) - the largest group of templates
The templates cover scenarios from the manual triggering of request updates through to automatically triggering the running of functions, in MS Azure / AWS, based on set criteria, to run functions systems management functions e.g. reboot a server.
The other tabs in the Automation area are.
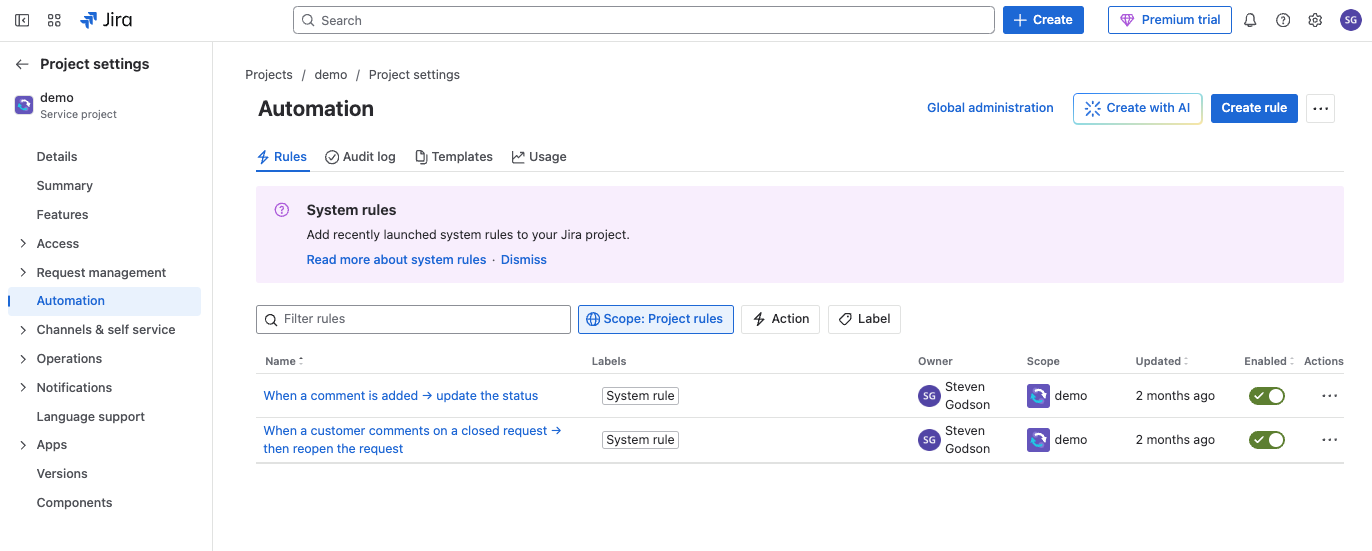
Rules - which lists all the rules created in your project and allows you to; enable/disable a rule, copy a rule and filter by action type and/or label.
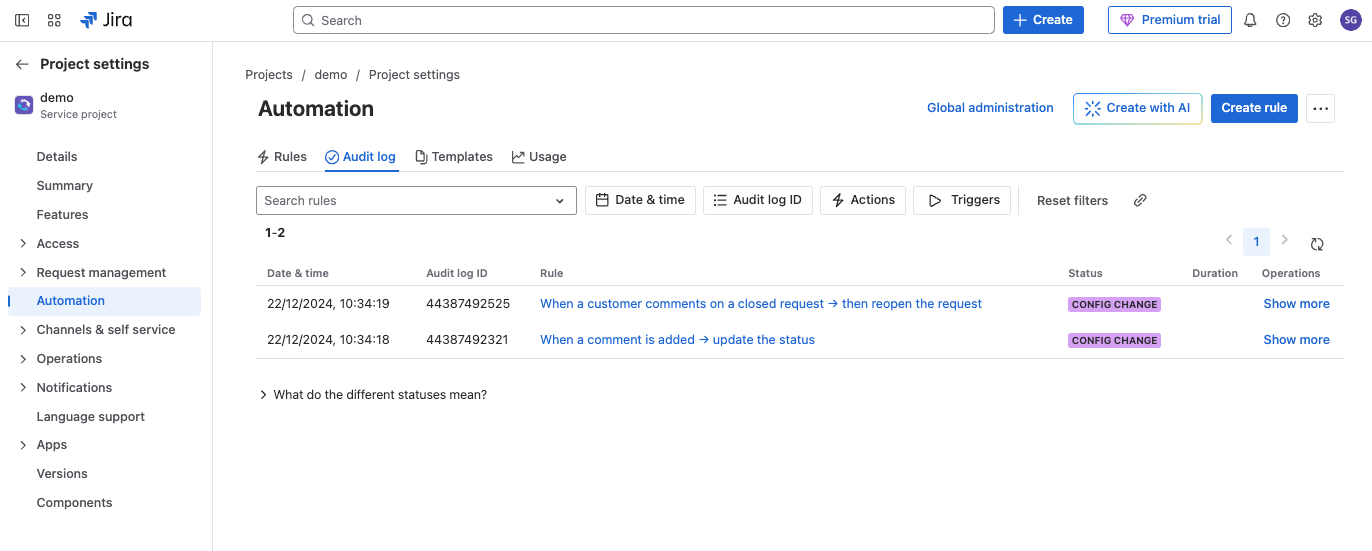
Audit log - which lists all the changes made to your project's automation rules and can be filtered by.
- Date and time
- Audit log ID
- Action type
- Triggers
Usage - lists the project automation invocations, which can be filtered by month.
Creating an automation rule
There are three ways to create an automation rule;
- Use a template, either as-is or as a starter
- Use Atlassian’s AI capability
- Start from a blank slate
Let’s explore these options in more detail.
Using a Template
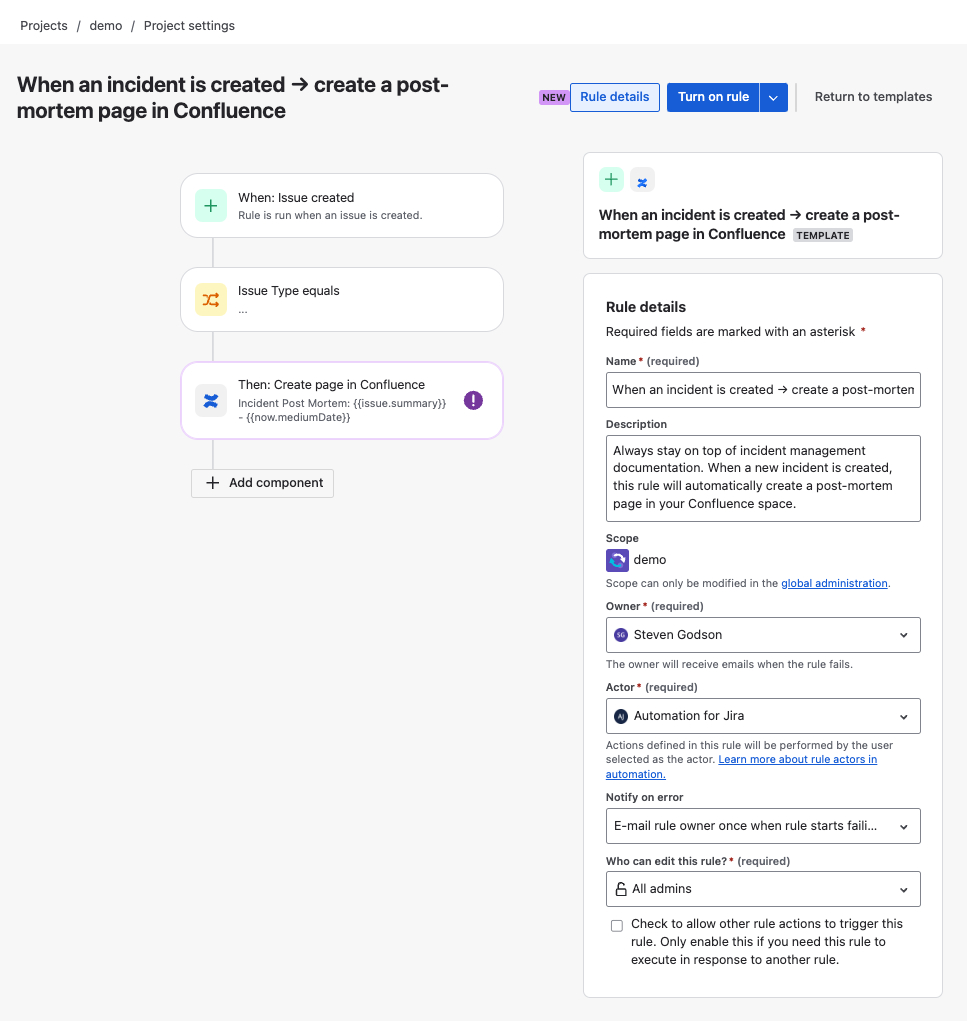
To use a template, navigate to Project settings -> Automation -> Templates and select the template that you want to use from the list.
The rule configuration screen will open and you will be asked to enter the required data. I have selected the When an incident is created → create a post-mortem page in Confluence template so, as a minimum, I need to populate the fields marked with an asterisk.
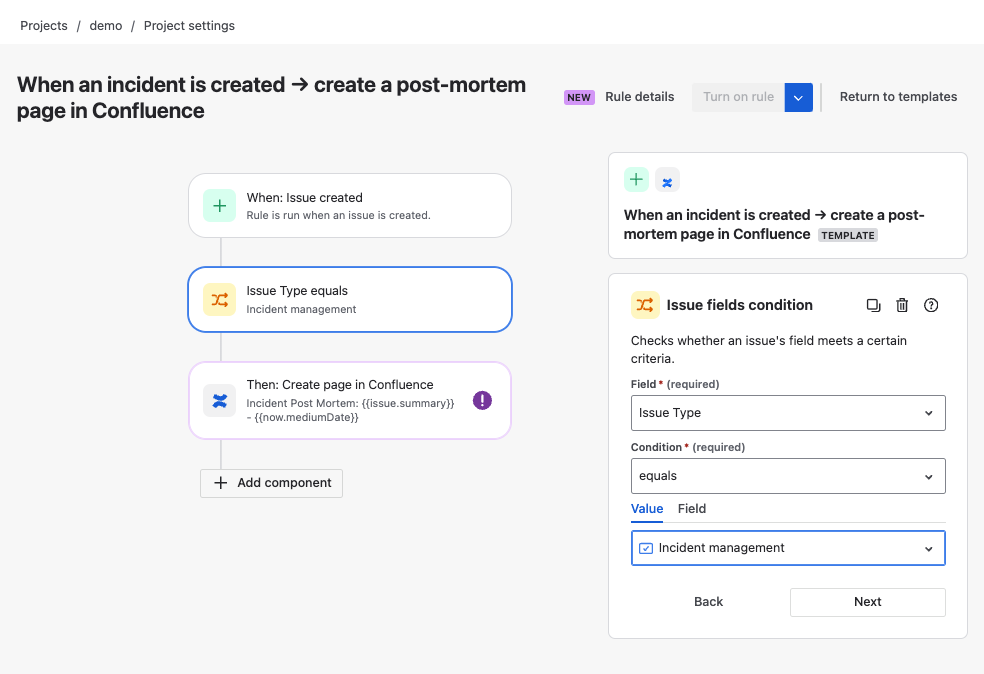
I then need to click on each element within the template and provide any additional information. For example, when I click on Issue type equals I am asked to provide a Field, Condition operator, and either Value or Field against which to assess the condition.
Clicking on *Next takes me to the next element in the automation flow. In the example I am using, I am prompted to connect a Confluence instance where the post-mortem page will be created. Once linked, I specify additional information, so that the post-mortem pages are created in the area that I want
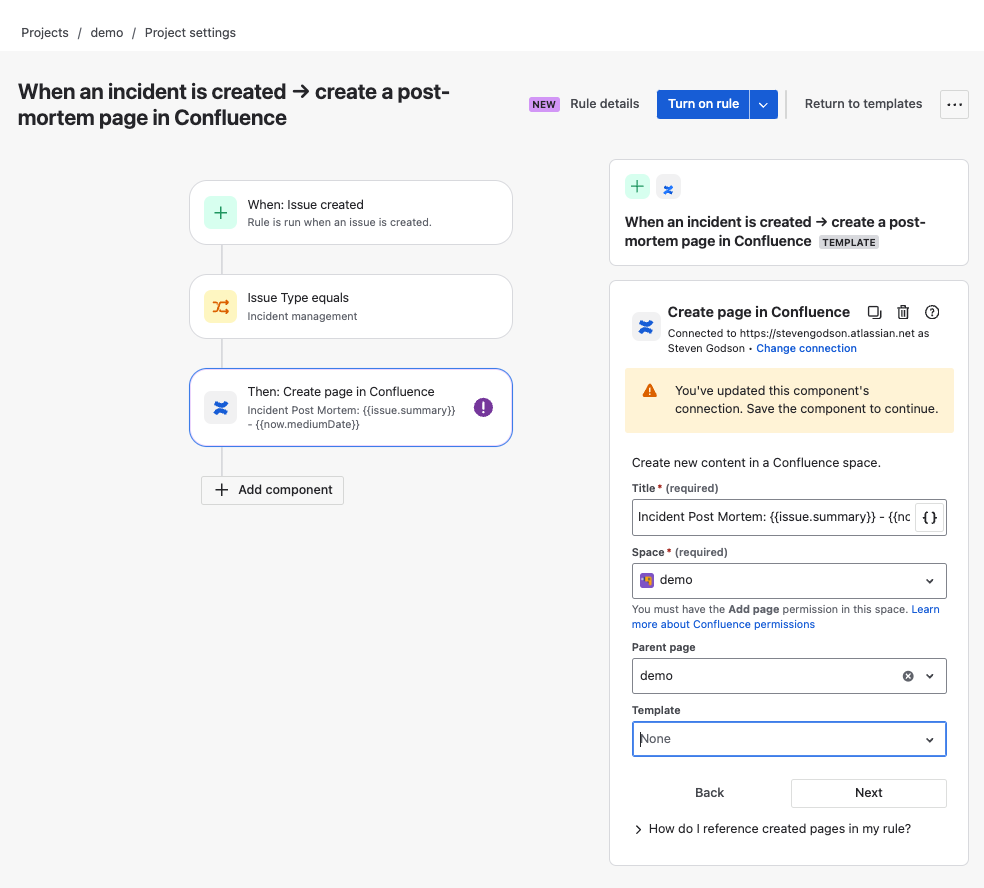
At this point I could select Next and with the rule on… or I can add additional components to the automation and extend its usefulness.
To add an additional step, simply click on the New component element. You will see that the right-hand menu has changed as shown below.
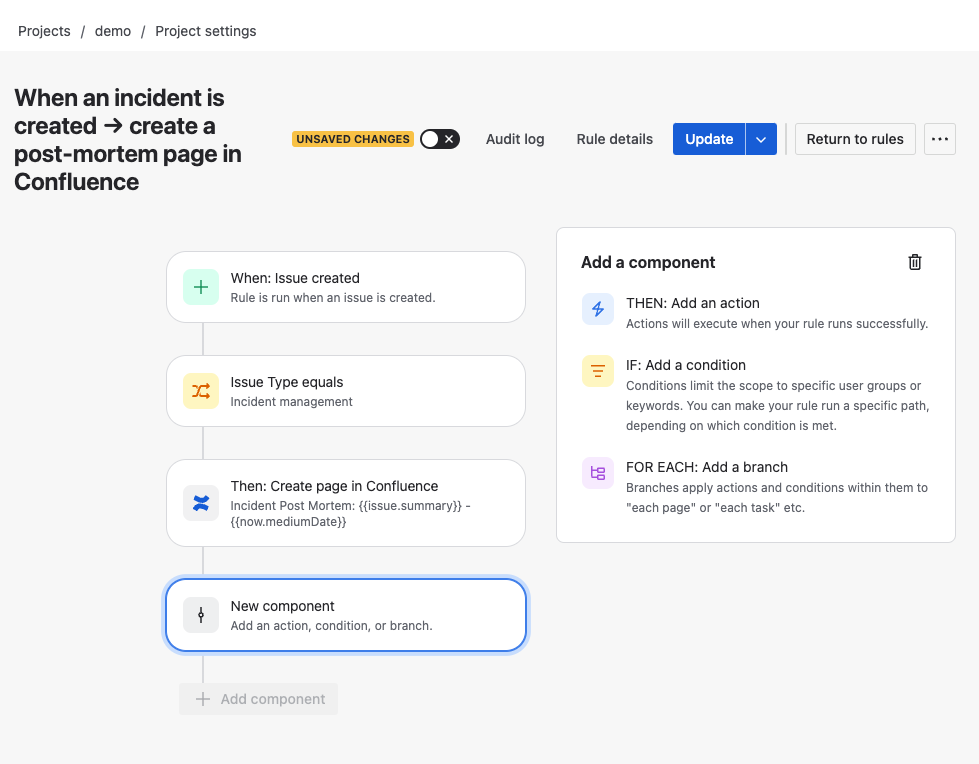
When you click on Then you will be presented with a list actions to choose from. For this demo I have selected the Send email action and populated the template.
To add in details into the email from the contents of the issue record you use a double set of curly brackets with the attribute name inside, for example {{issue.reporter.displayName}}. Thankfully Atlassian don’t expect you to know these and, by clicking on the { } icon in any field where you can add attribute details, provides a searchable list of available attributes.

I then click on Save or Update to include the new element.
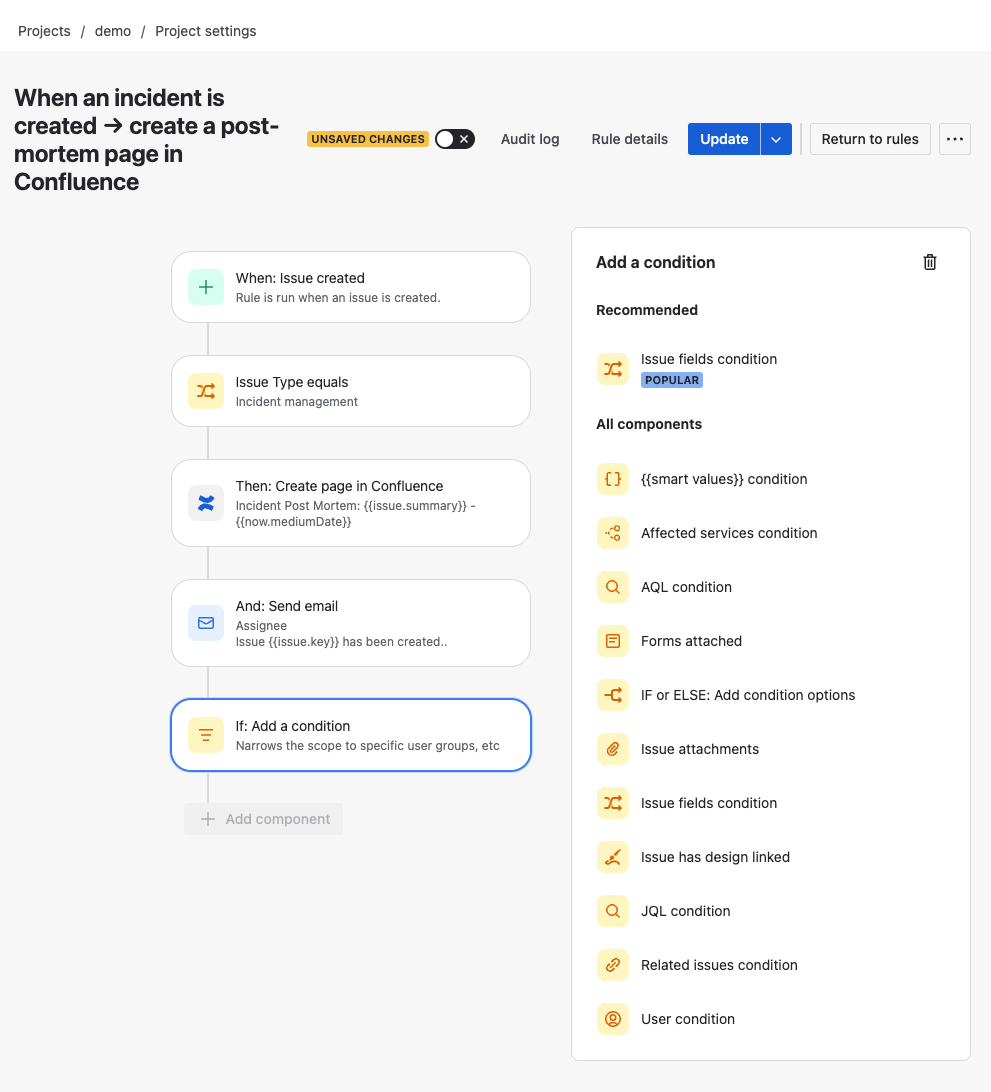
You can also add conditional statements into your automation flow by clicking on IF: Add a condition, you will see the following options.
As well as a THEN and IF you can also add a FOR EACH element which creates a branch in your automation.
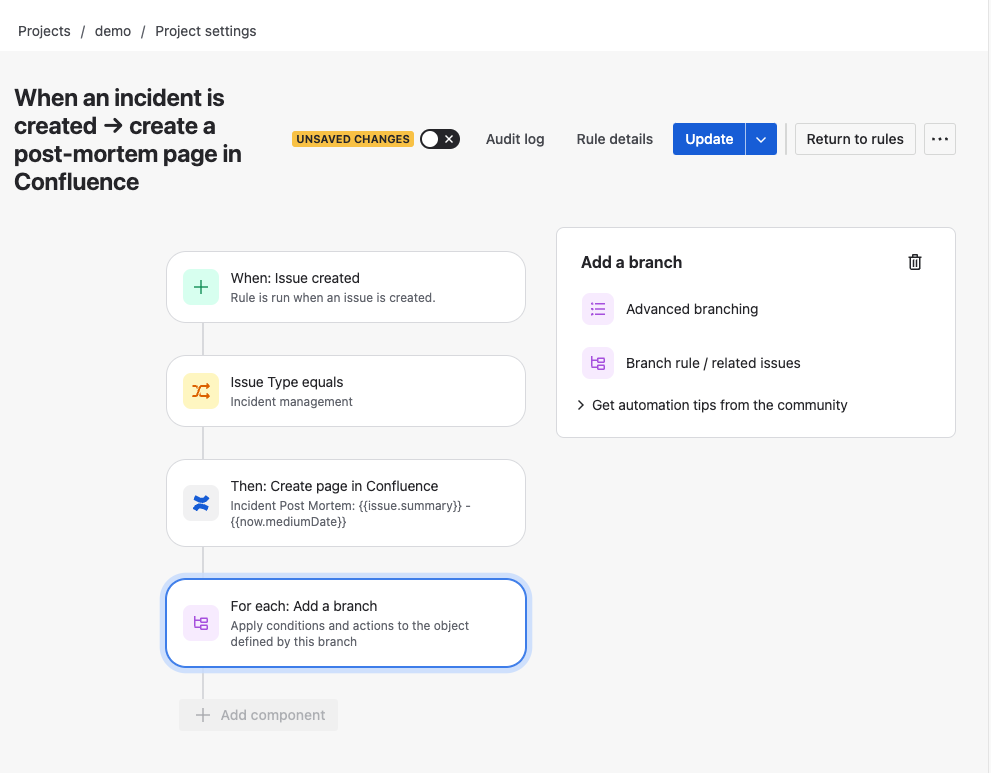
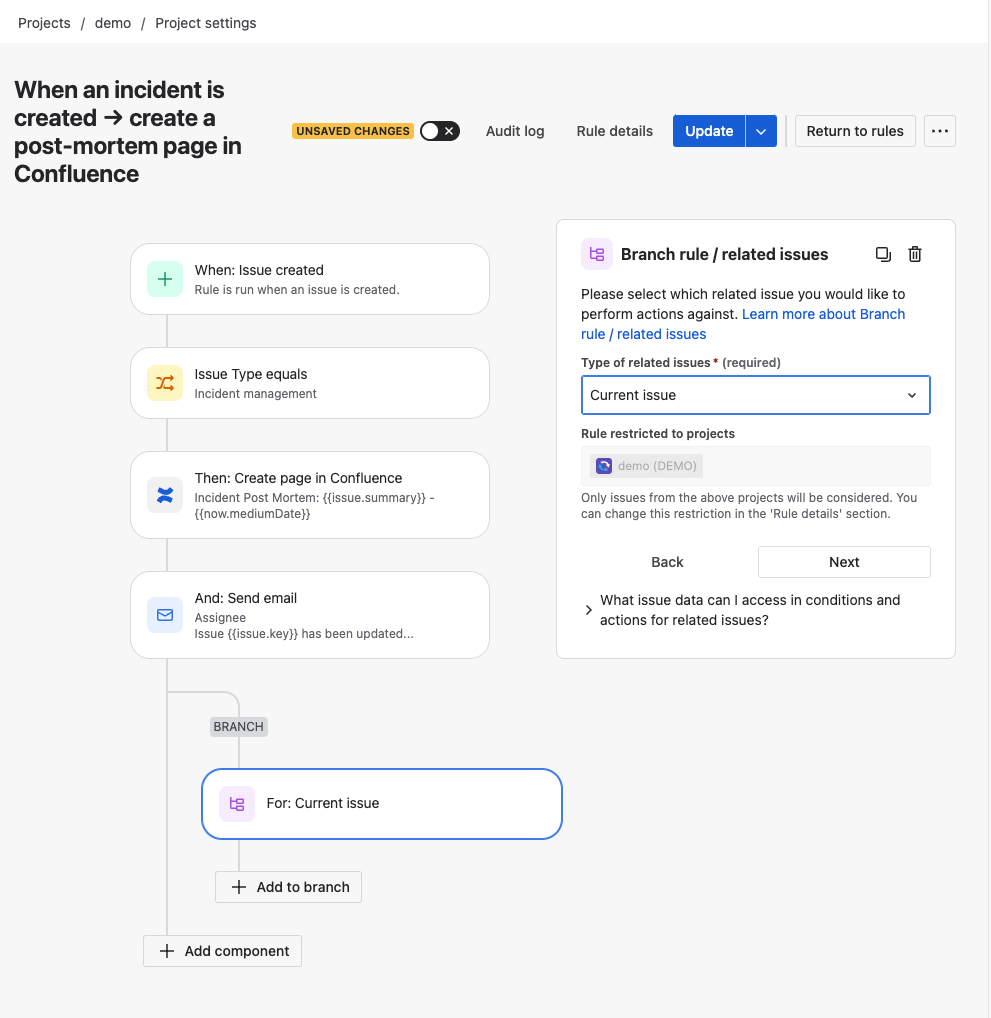
You can add a branch that relates to the
- Current Issue
- Sub-tasks of the current issue
- Parent of the current issue
- Children of the current issue
- All created issues
- Most recently created issue
- Destination issues
- Issues fixed in version
- Issues fixed in Sprint
- Similar issue description
- JQL (JIRA Query Language) which creates a matchable search string
- Stories or Epics in JIRA Software
Use AI
If you want to use the Atlassian AI, to help generate your automation workflow, navigate to Project settings -> Automation -> Templates.
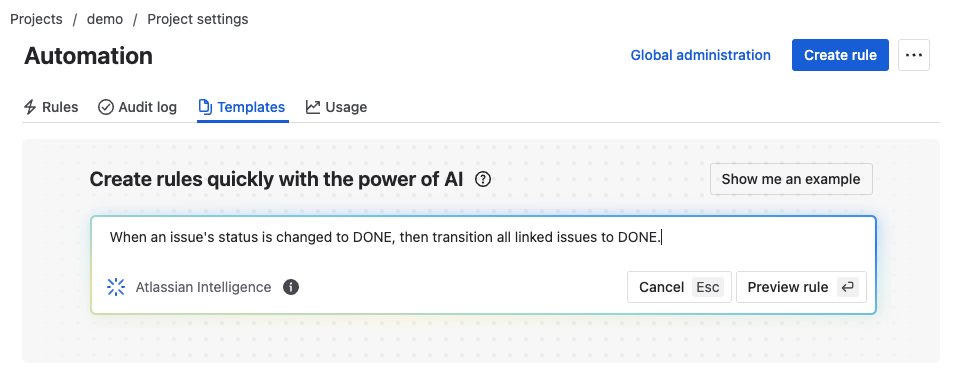
The AI field is at the top of the screen. Once you have entered your requirement, click on Preview rule and Atlassian will generate an automation workflow based on the criteria you entered.
Note: As with any Generative AI solution, getting the prompts correct is key to getting the most optimal outcome. My recommendation is to keep your prompts succinct and use ITSM-oriented language.
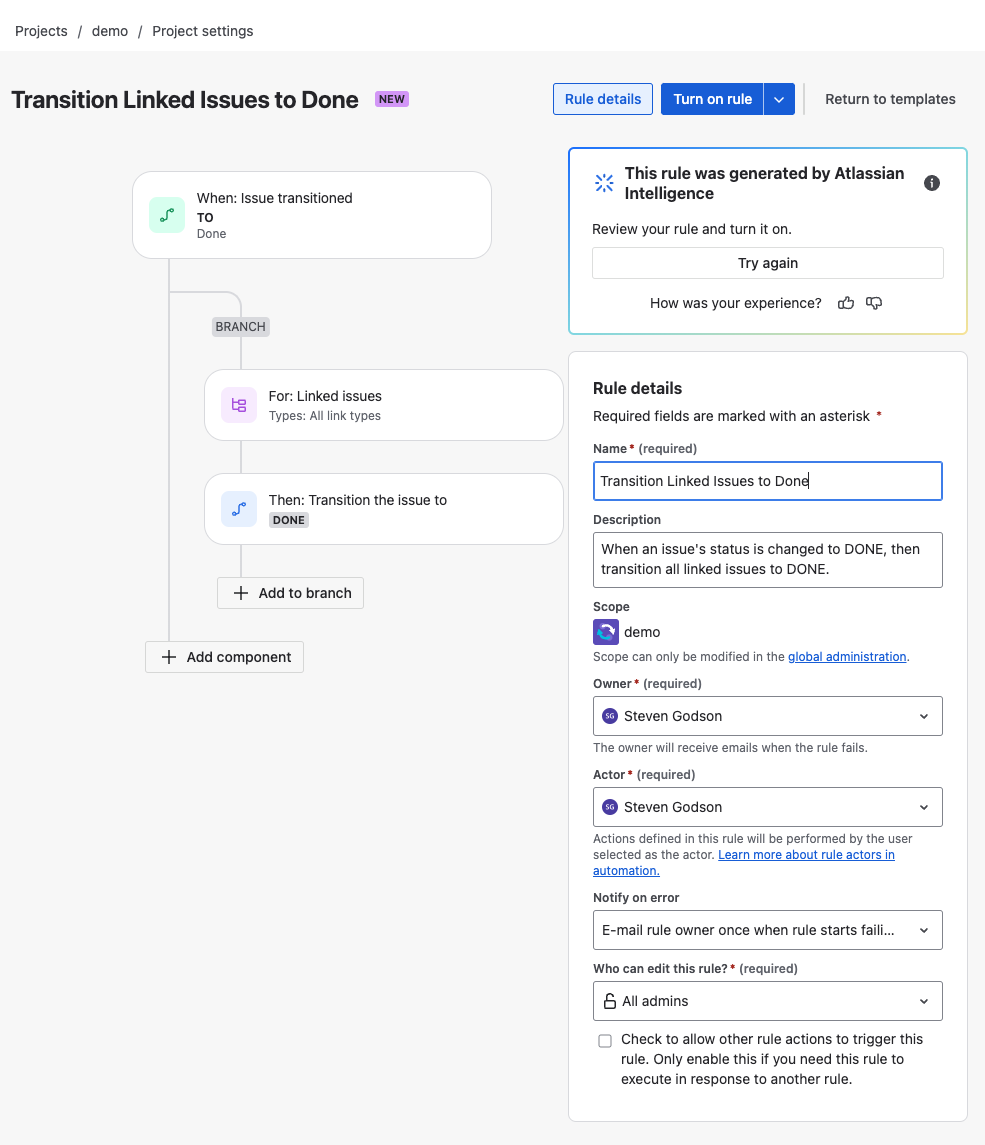
From this screen, you can enter any required information, into the AI proposed elements, and add/remove components as described under the Template section above.
Blank slate
If you want to create your automation workflow, from a blank slate, navigate to Project settings -> Automation and click on Create.
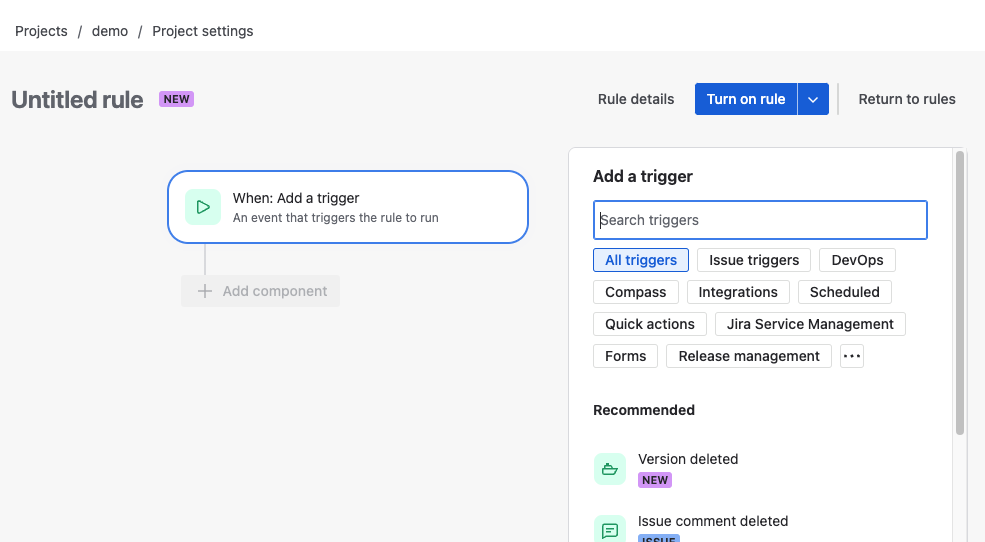
Once you have taken the tour, or skipped past it, you will see the following screen where you can art to create your workflow.
For example, the following shows the creation of a simple rule to email the reporter of an issue when the status is changed to ‘Waiting for Customer’.
First, set the TRIGGER condition, in this can Issue Updated. For this to work in JSM, you need to select an option from the Issues part of the list.
Next, I add an IF condition, where I specify the issue status.
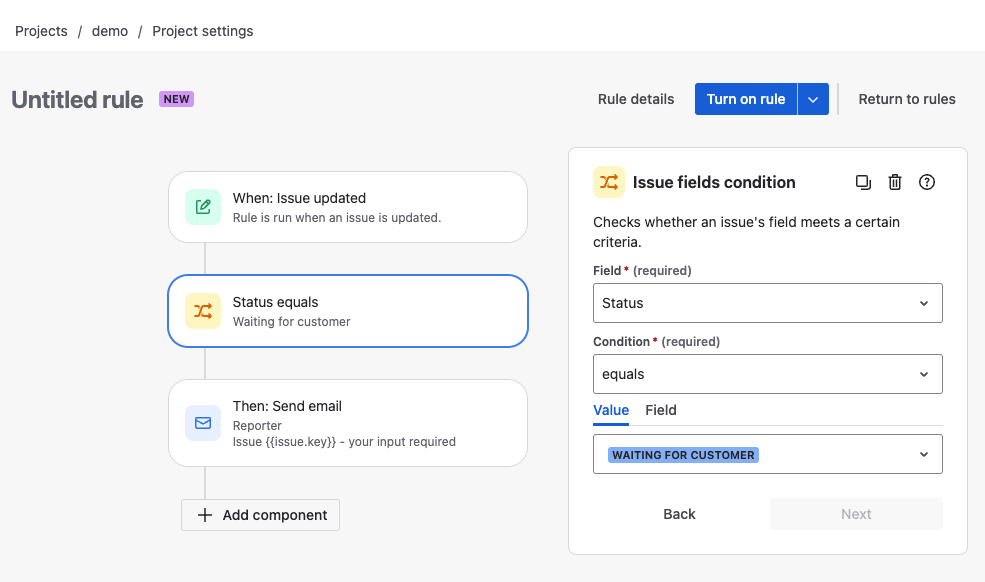
And then a THEN action to send an email and populate the form as shown below.
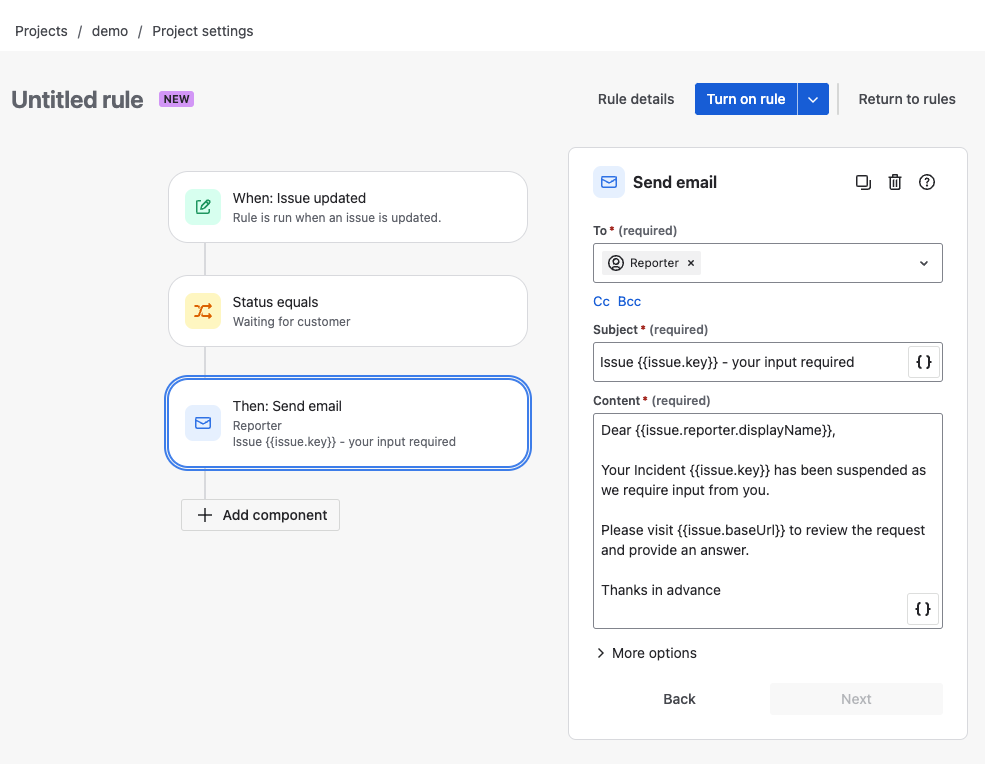
I then click on Turn on rule to same and initiate the rule. I am prompted to specify a name for the automation rule, and which roles can edit it, and Atlassian makes the rule live.
You can just save the rule for further editing by clicking on the arrow, beside the Turn on rule button, and selecting the appropriate option.
Conclusion
In summary, process automation in ITSM offers a multitude of benefits, including increased efficiency, reduced errors, enhanced user satisfaction, and cost savings. By leveraging automation, businesses can optimise their IT operations and focus on strategic initiatives that drive long-term success.
JSM provides an intuitive and robust solution to deliver automation in your ITSM environment.
Embrace the power of JSM and unlock new levels of productivity and reliability in your IT operations.
Hopefully, this has been useful to you and I wish you well on your ITSM journey…