
JIRA Service Management
Introduction to JIRA Service Management
Series: JSM, Post #1
First posted: Dec 24 2024
Read time: 15 minutes
Written By: Steven Godson
Greetings!
Welcome to a new series of articles in which we will look at Atlassian’s JIRA Service Management (JSM) product and I will explain how to set it up so that you can make the most of the products capabilities.
So what is JSM?
JSM is a service / support desk tool that provides businesses with that capability to quickly implement one or more service projects to cater for a range of business function use cases. Under the hood it is essentially JIRA Software, so any organisation that uses JIRA for developing products will find it all quite familiar. In my opinion using both modules together is a good basis for implementing a highly integrated support and development model.
Out of the box it provides an enough basic functionality to engage with customers and log & track issues and requests. However, with the available extensions and integrations, it has the potential to become the beating heart of an enterprise scale IT operation.
In this initial article we will focus on the initial setup of JSM and getting a basic instance up and running. Then, in subsequent articles, we will be going into the various capabilities in greater depth and looking at the options currently available.
JSM Design Thinking
While not wholly necessary, if you are an experienced JIRA administrator, I highly recommend creating a design of some sort prior to creating and configuring a JSM instance.
Such a document should consider the following.
- License requirements e.g. how many users and of what type, this includes
- JSM (inc upgrades for Asset Management)
- Confluence
- Atlassian Guard
- Access management and role based controls e.g. how you want to manage user access and to what level
- Scope of the Service Desk that will be using the project. Processes, form design, workflows, and required outputs should all be considered
- What Service Level Agreements need to be tracked and monitored in the tool
- How will users engage with the Service Desk e.g. portal, email, chat, voice etc How your support teams work and what views they require
- What standards need to be adhered to and therefore what process controls need to be in place e.g. ISE/IEC 20000-1, ISO/IEC 27001, HIPAA, COBIT etc
- Reporting and dashboard needs should be considered
- Integration with other tools, such as
- Slack or Teams
- Enterprise Monitoring tools e.g. DataDog, AWS Cloud Watch or Azure Monitor
- Email integration
Creating a document that describes what you will be deploying helps focus the minds of all stakeholders and provides an auditable baseline of what you intended and agreed to do.
Initial Setup
The first thing you will need to do, assuming you do not already have an Atlassian account, is to register an account with Atlassian and say that you want to use JSM. Once registered you will be presented with the below choices. Your selection is obviously dependent on what your business driver is for implementing JSM. This series of articles looks specifically at the IT Support use case.
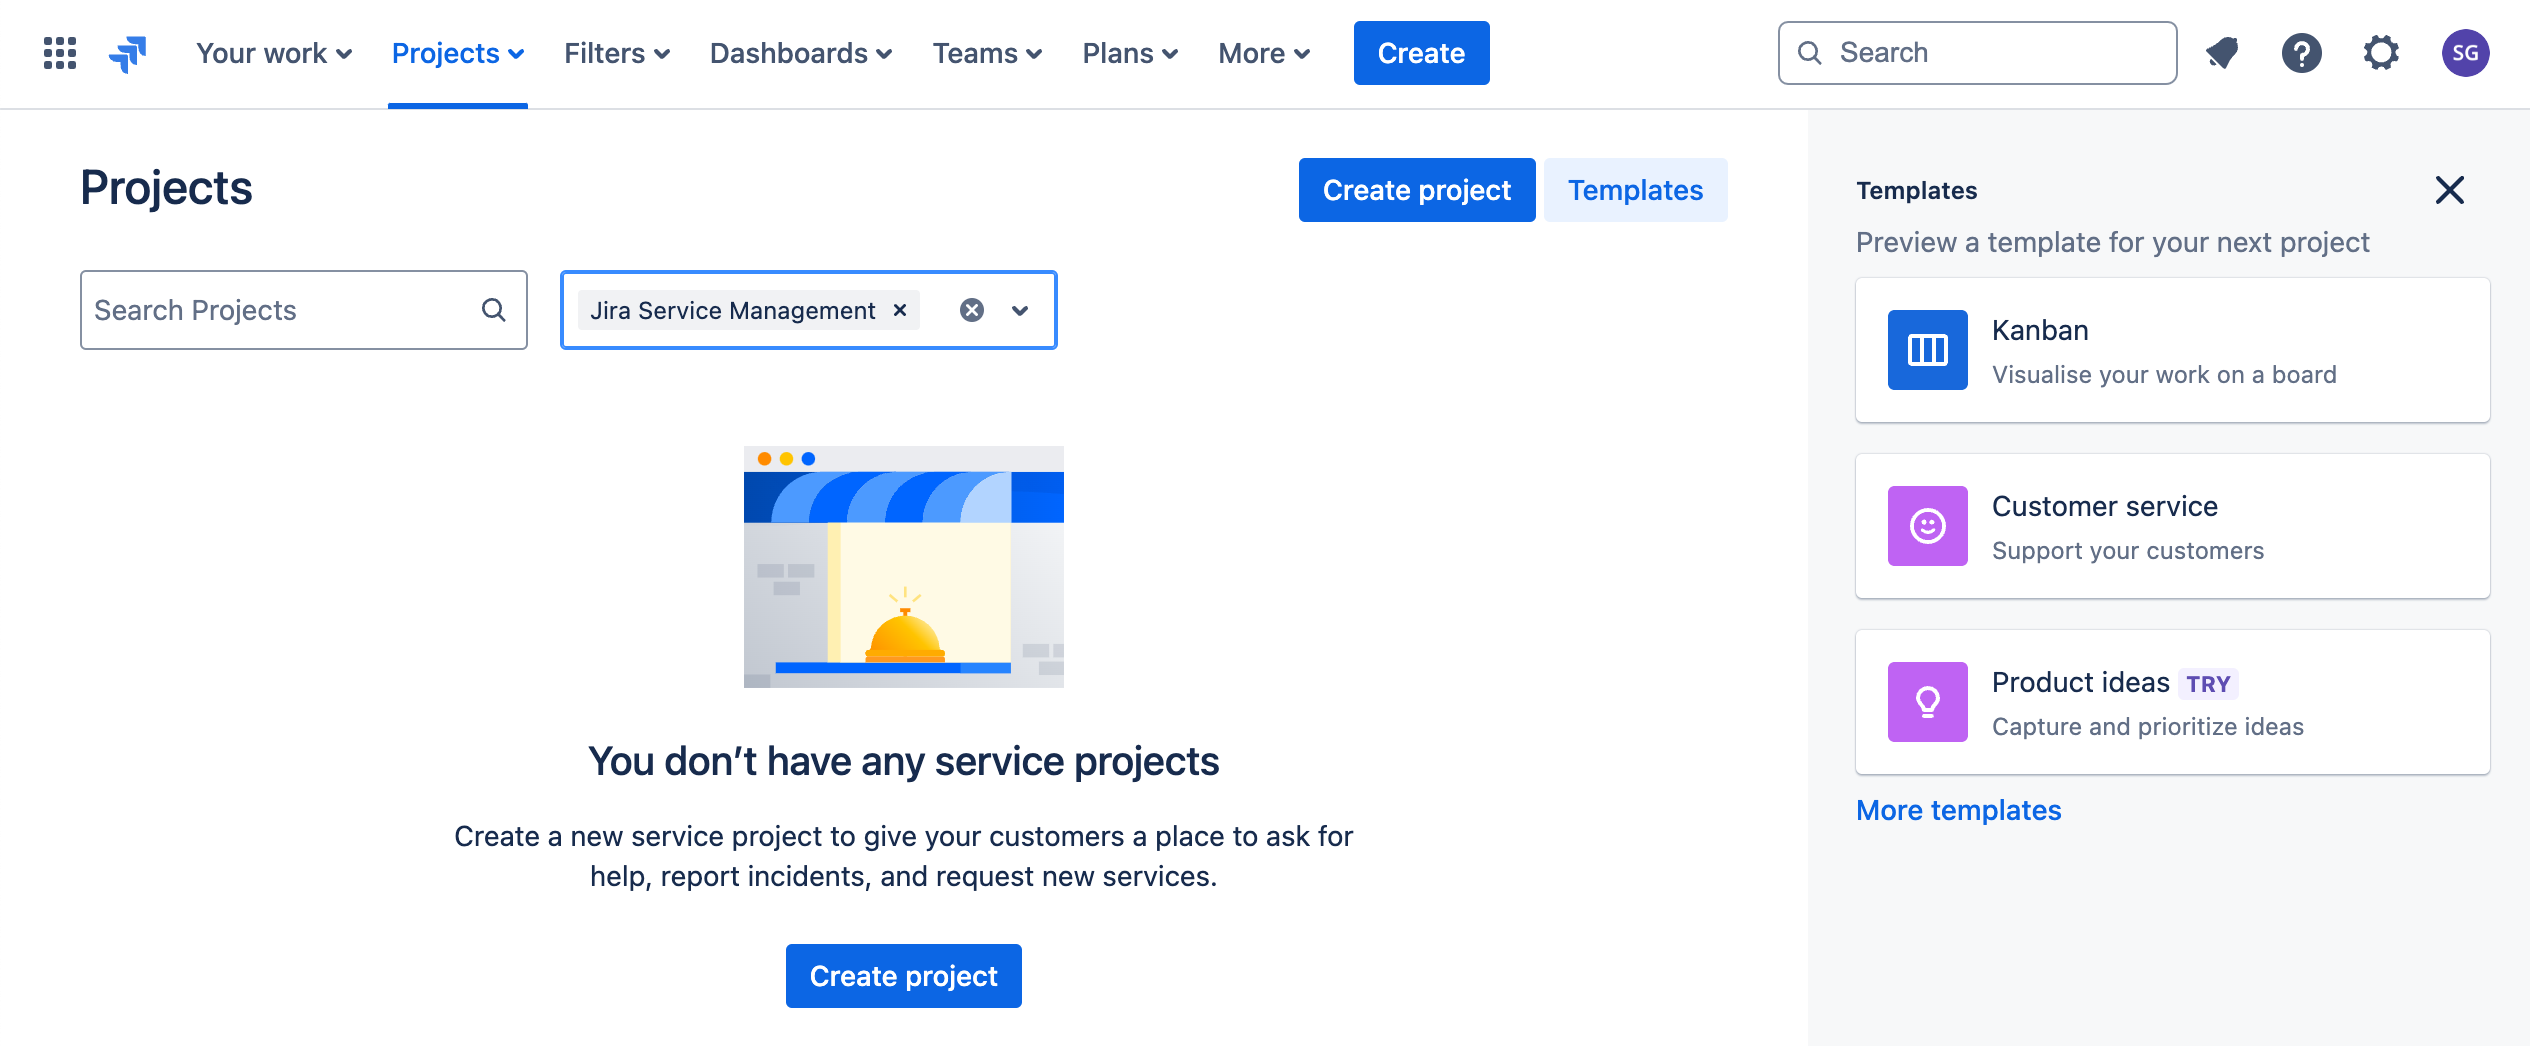
This selection takes you to the Projects screen. This where you can create and manage all the JSM projects that your business requires.
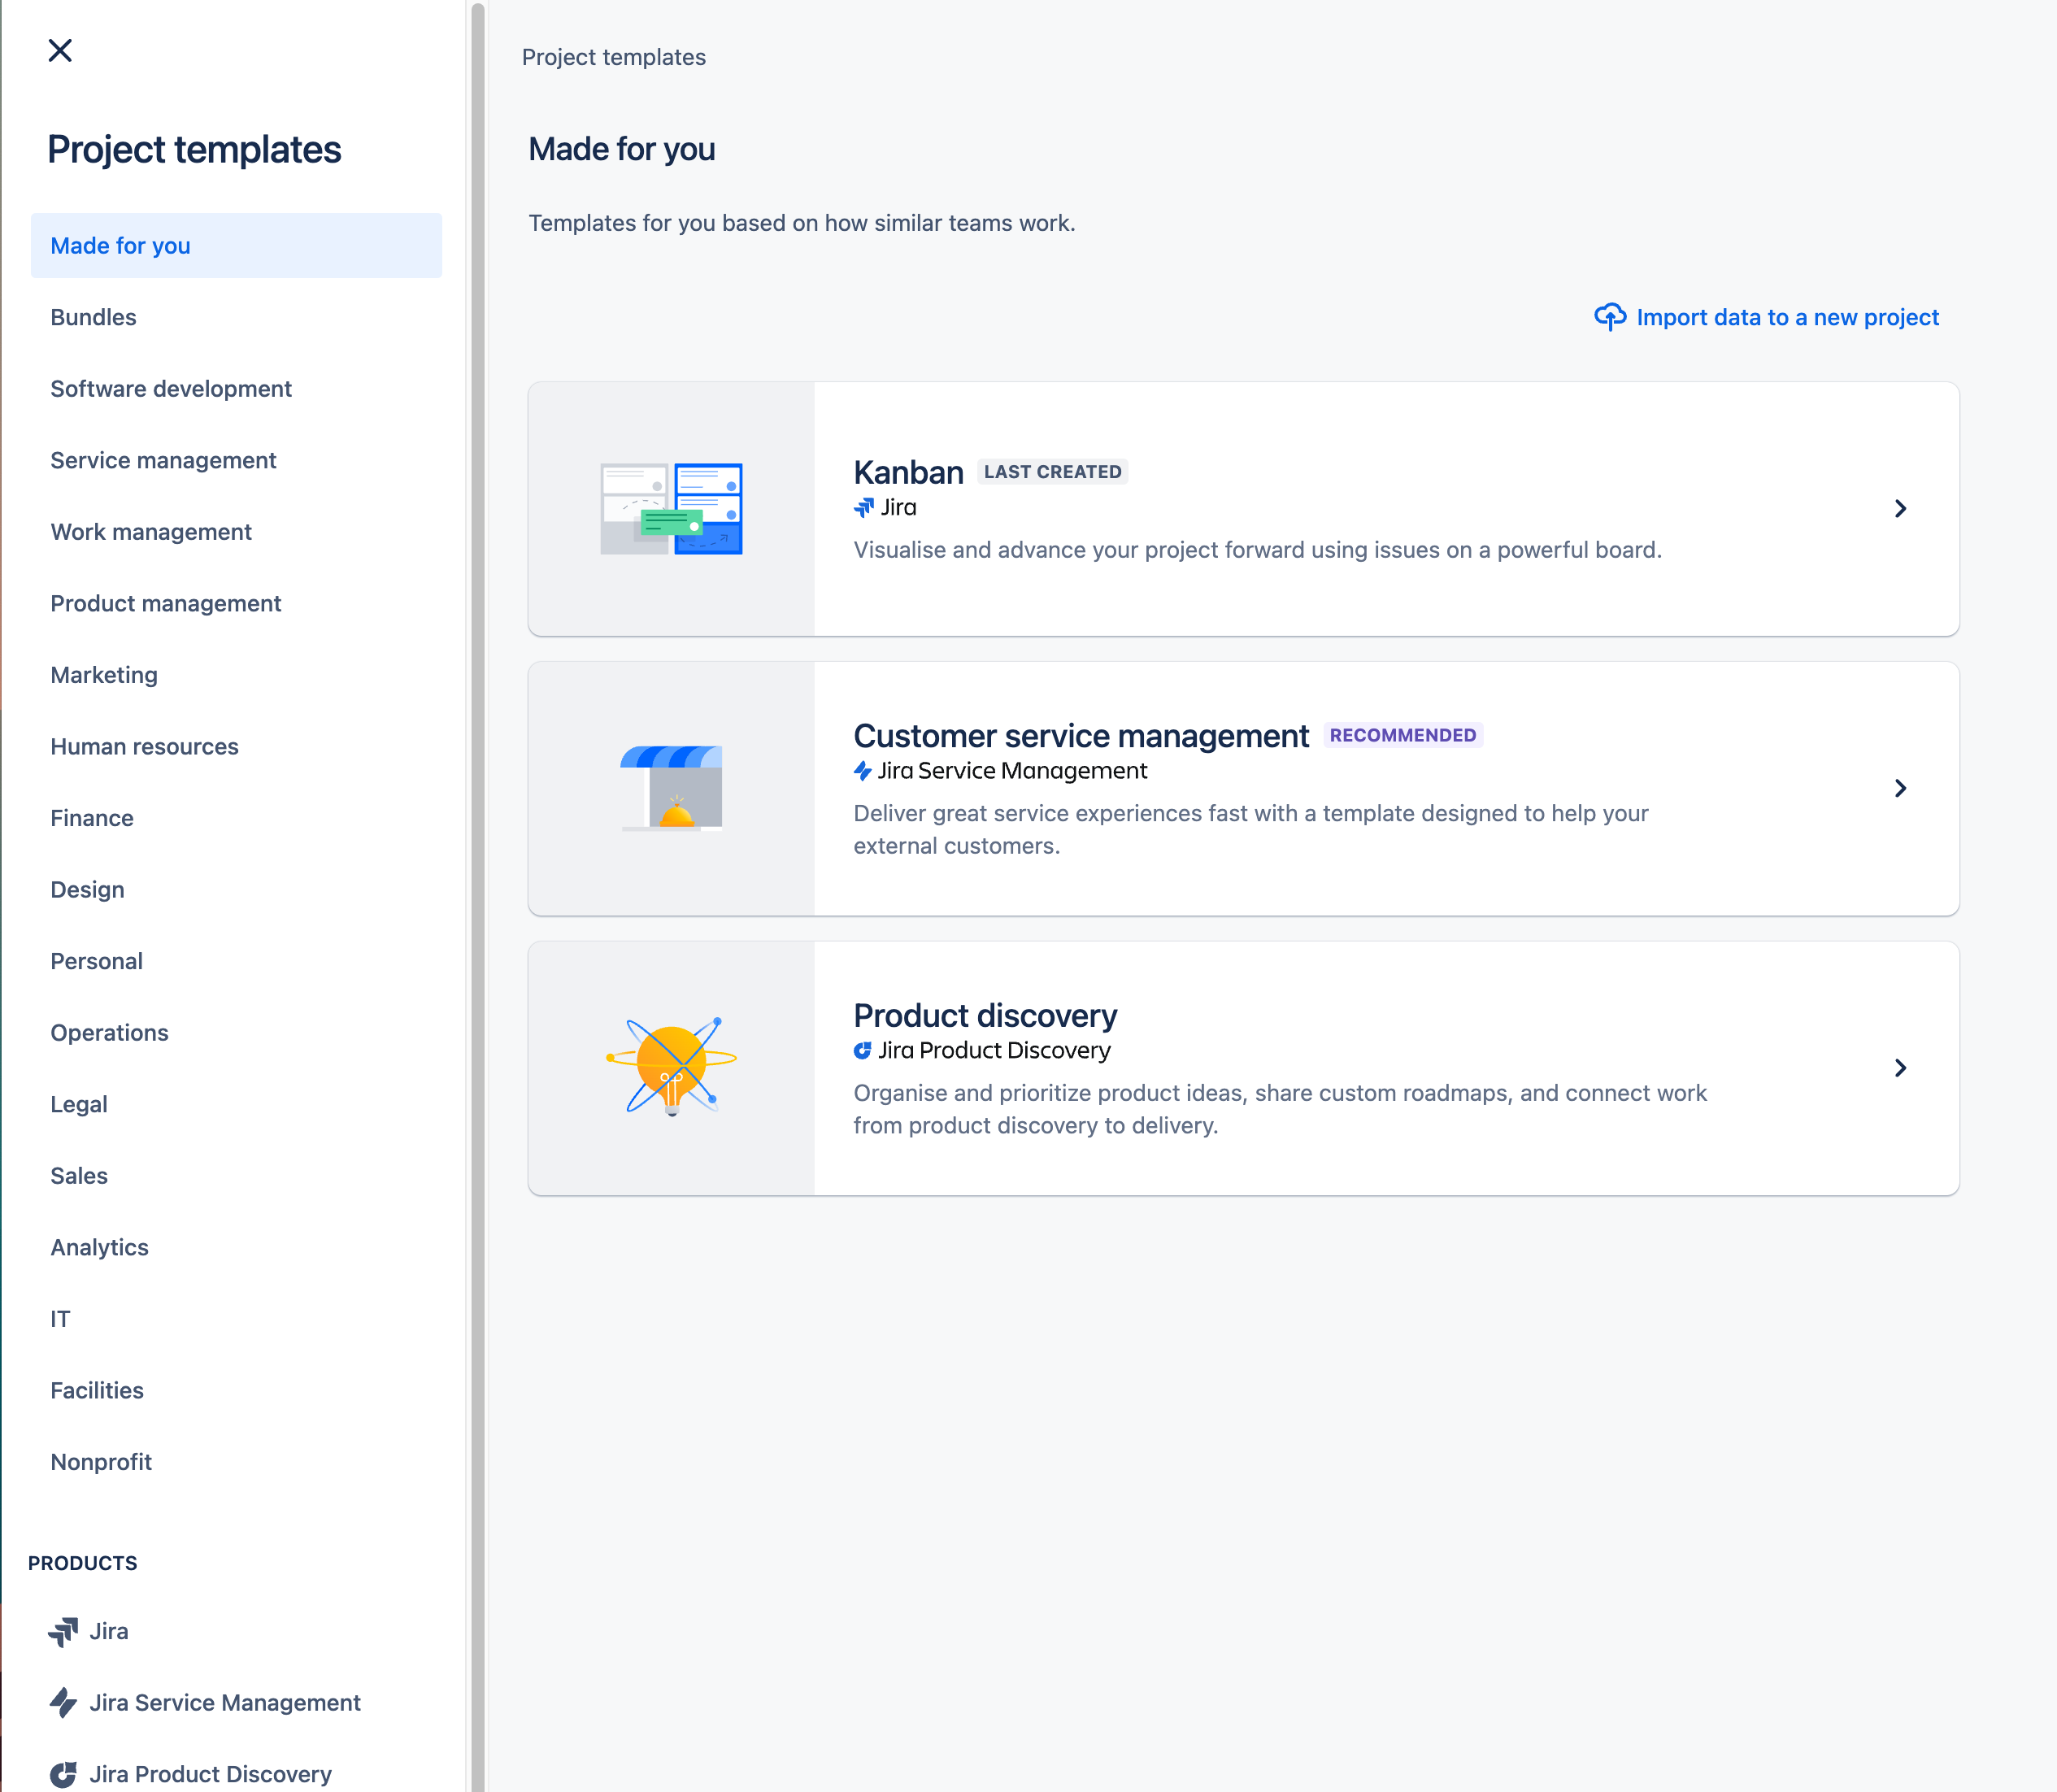
Select Customer service management from the next screen.
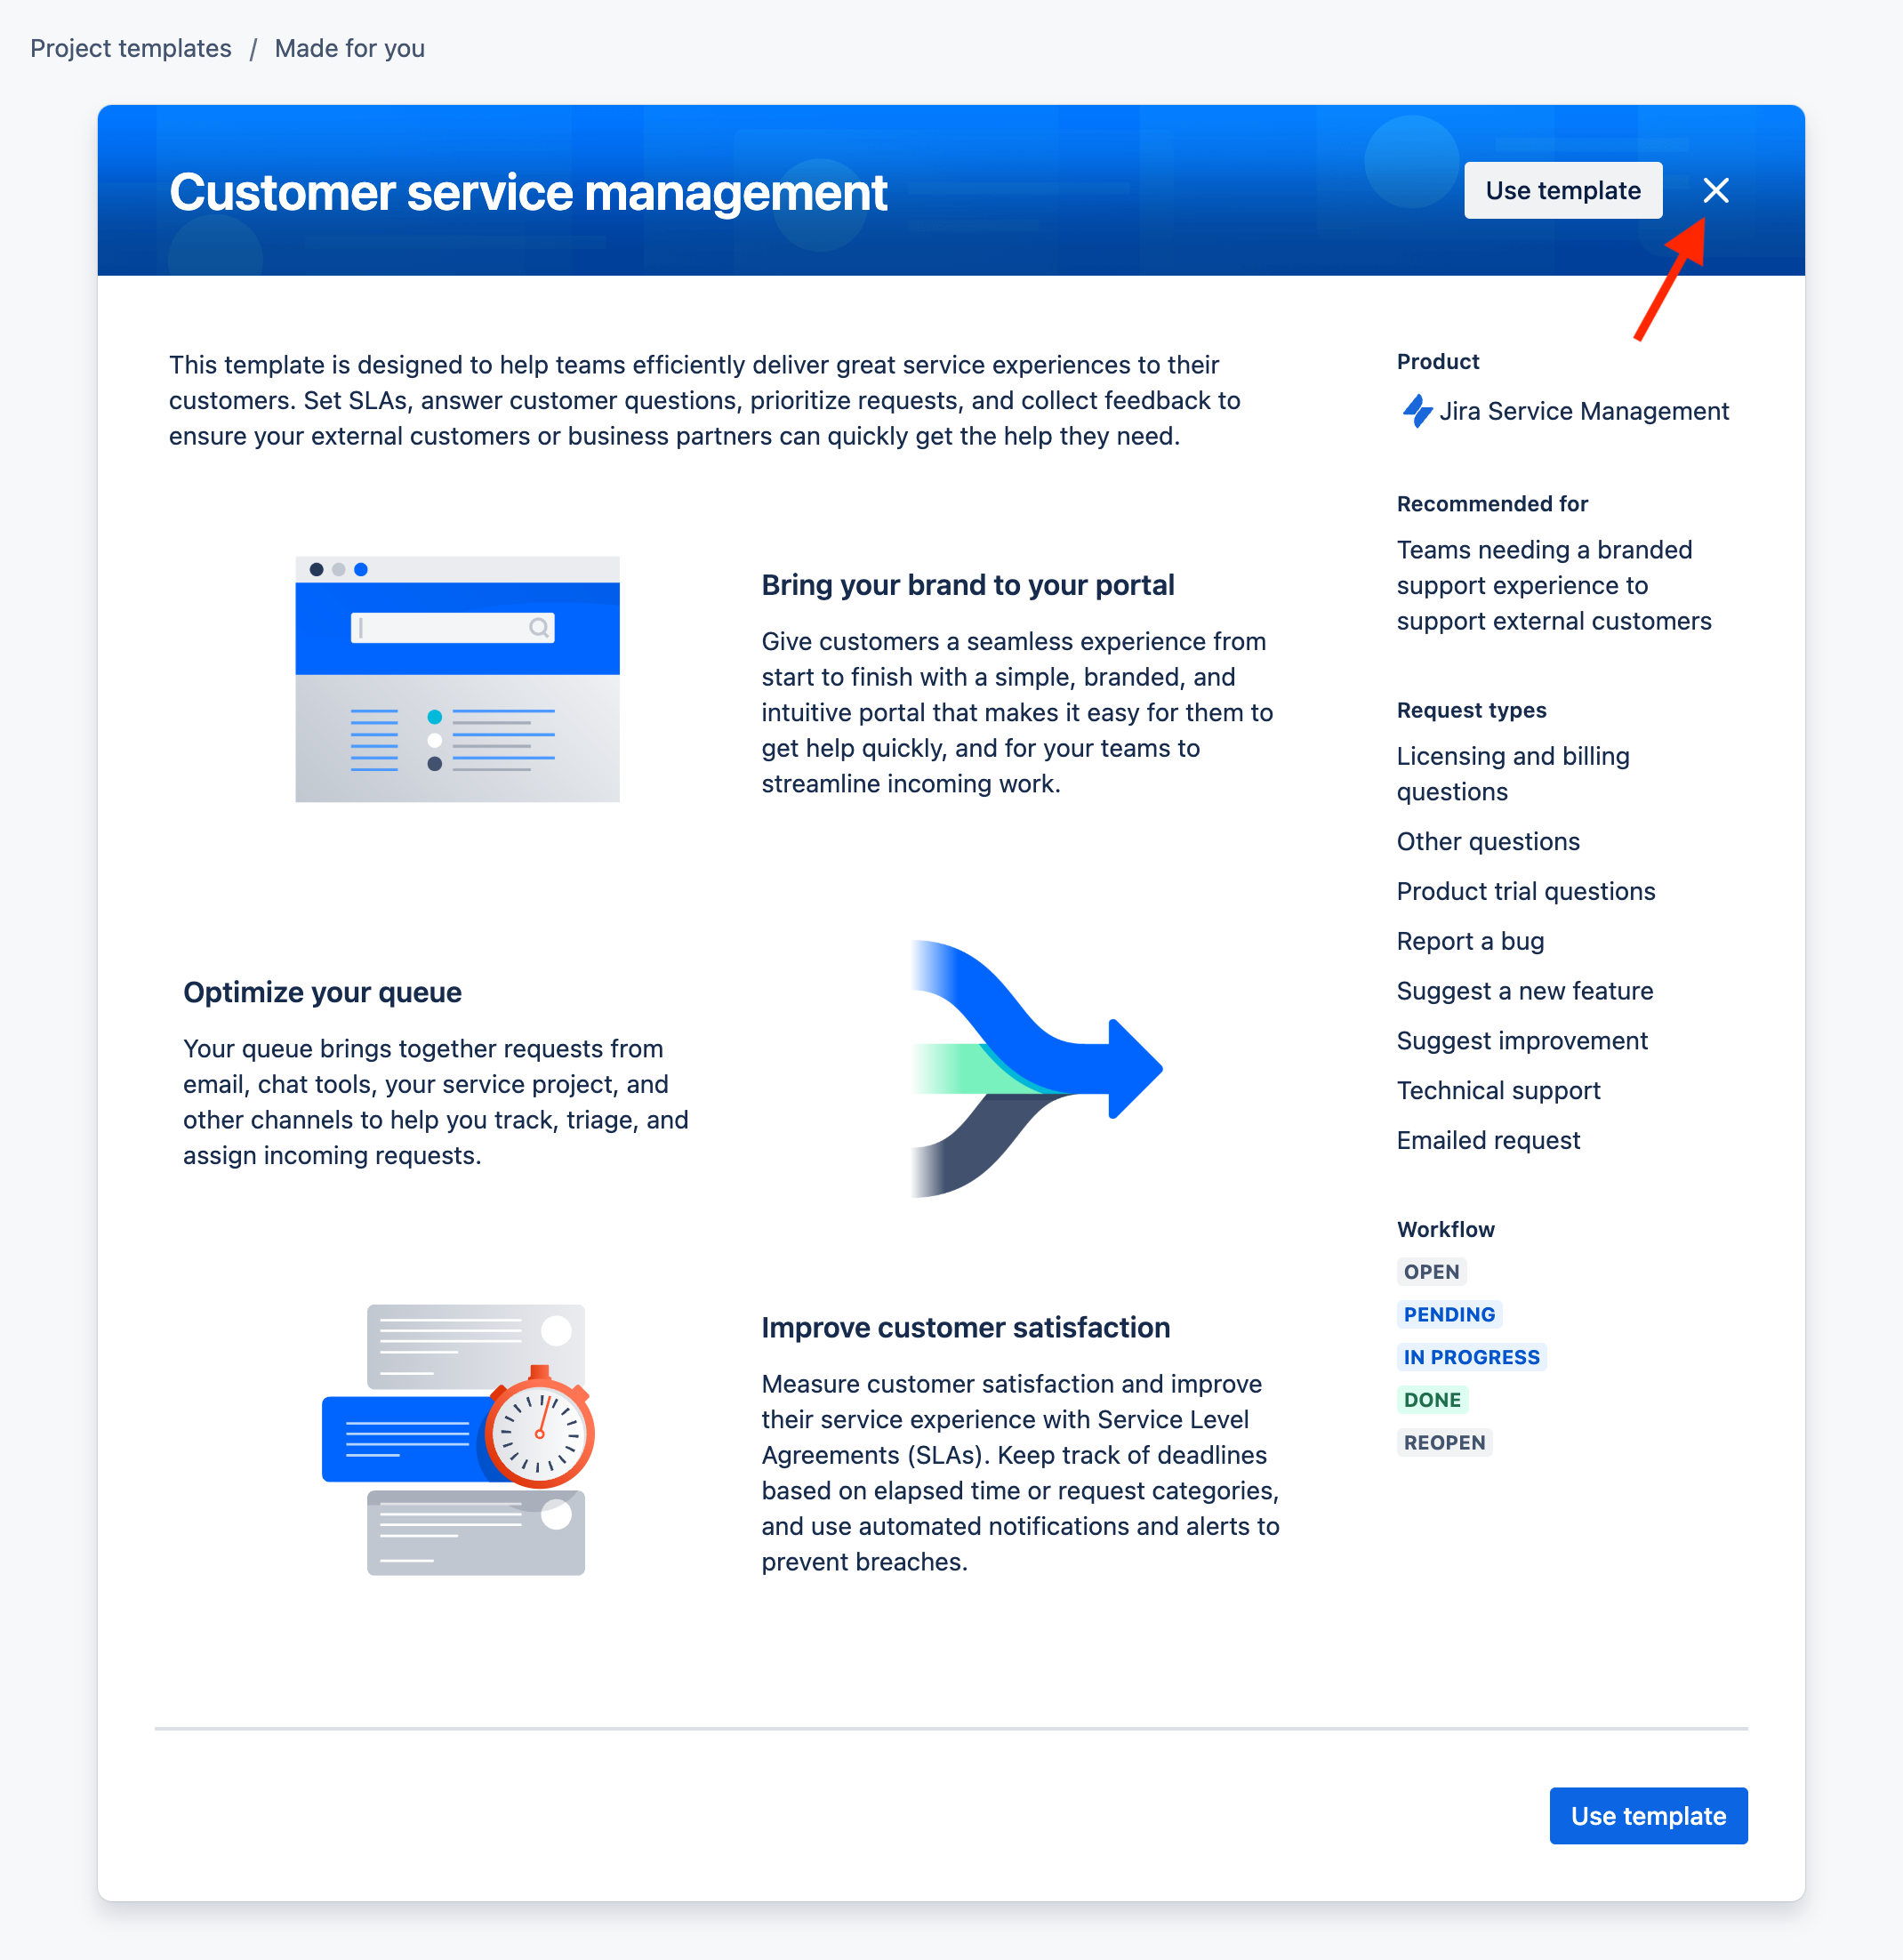
The next screen tells you to select a Customer Service Management template.
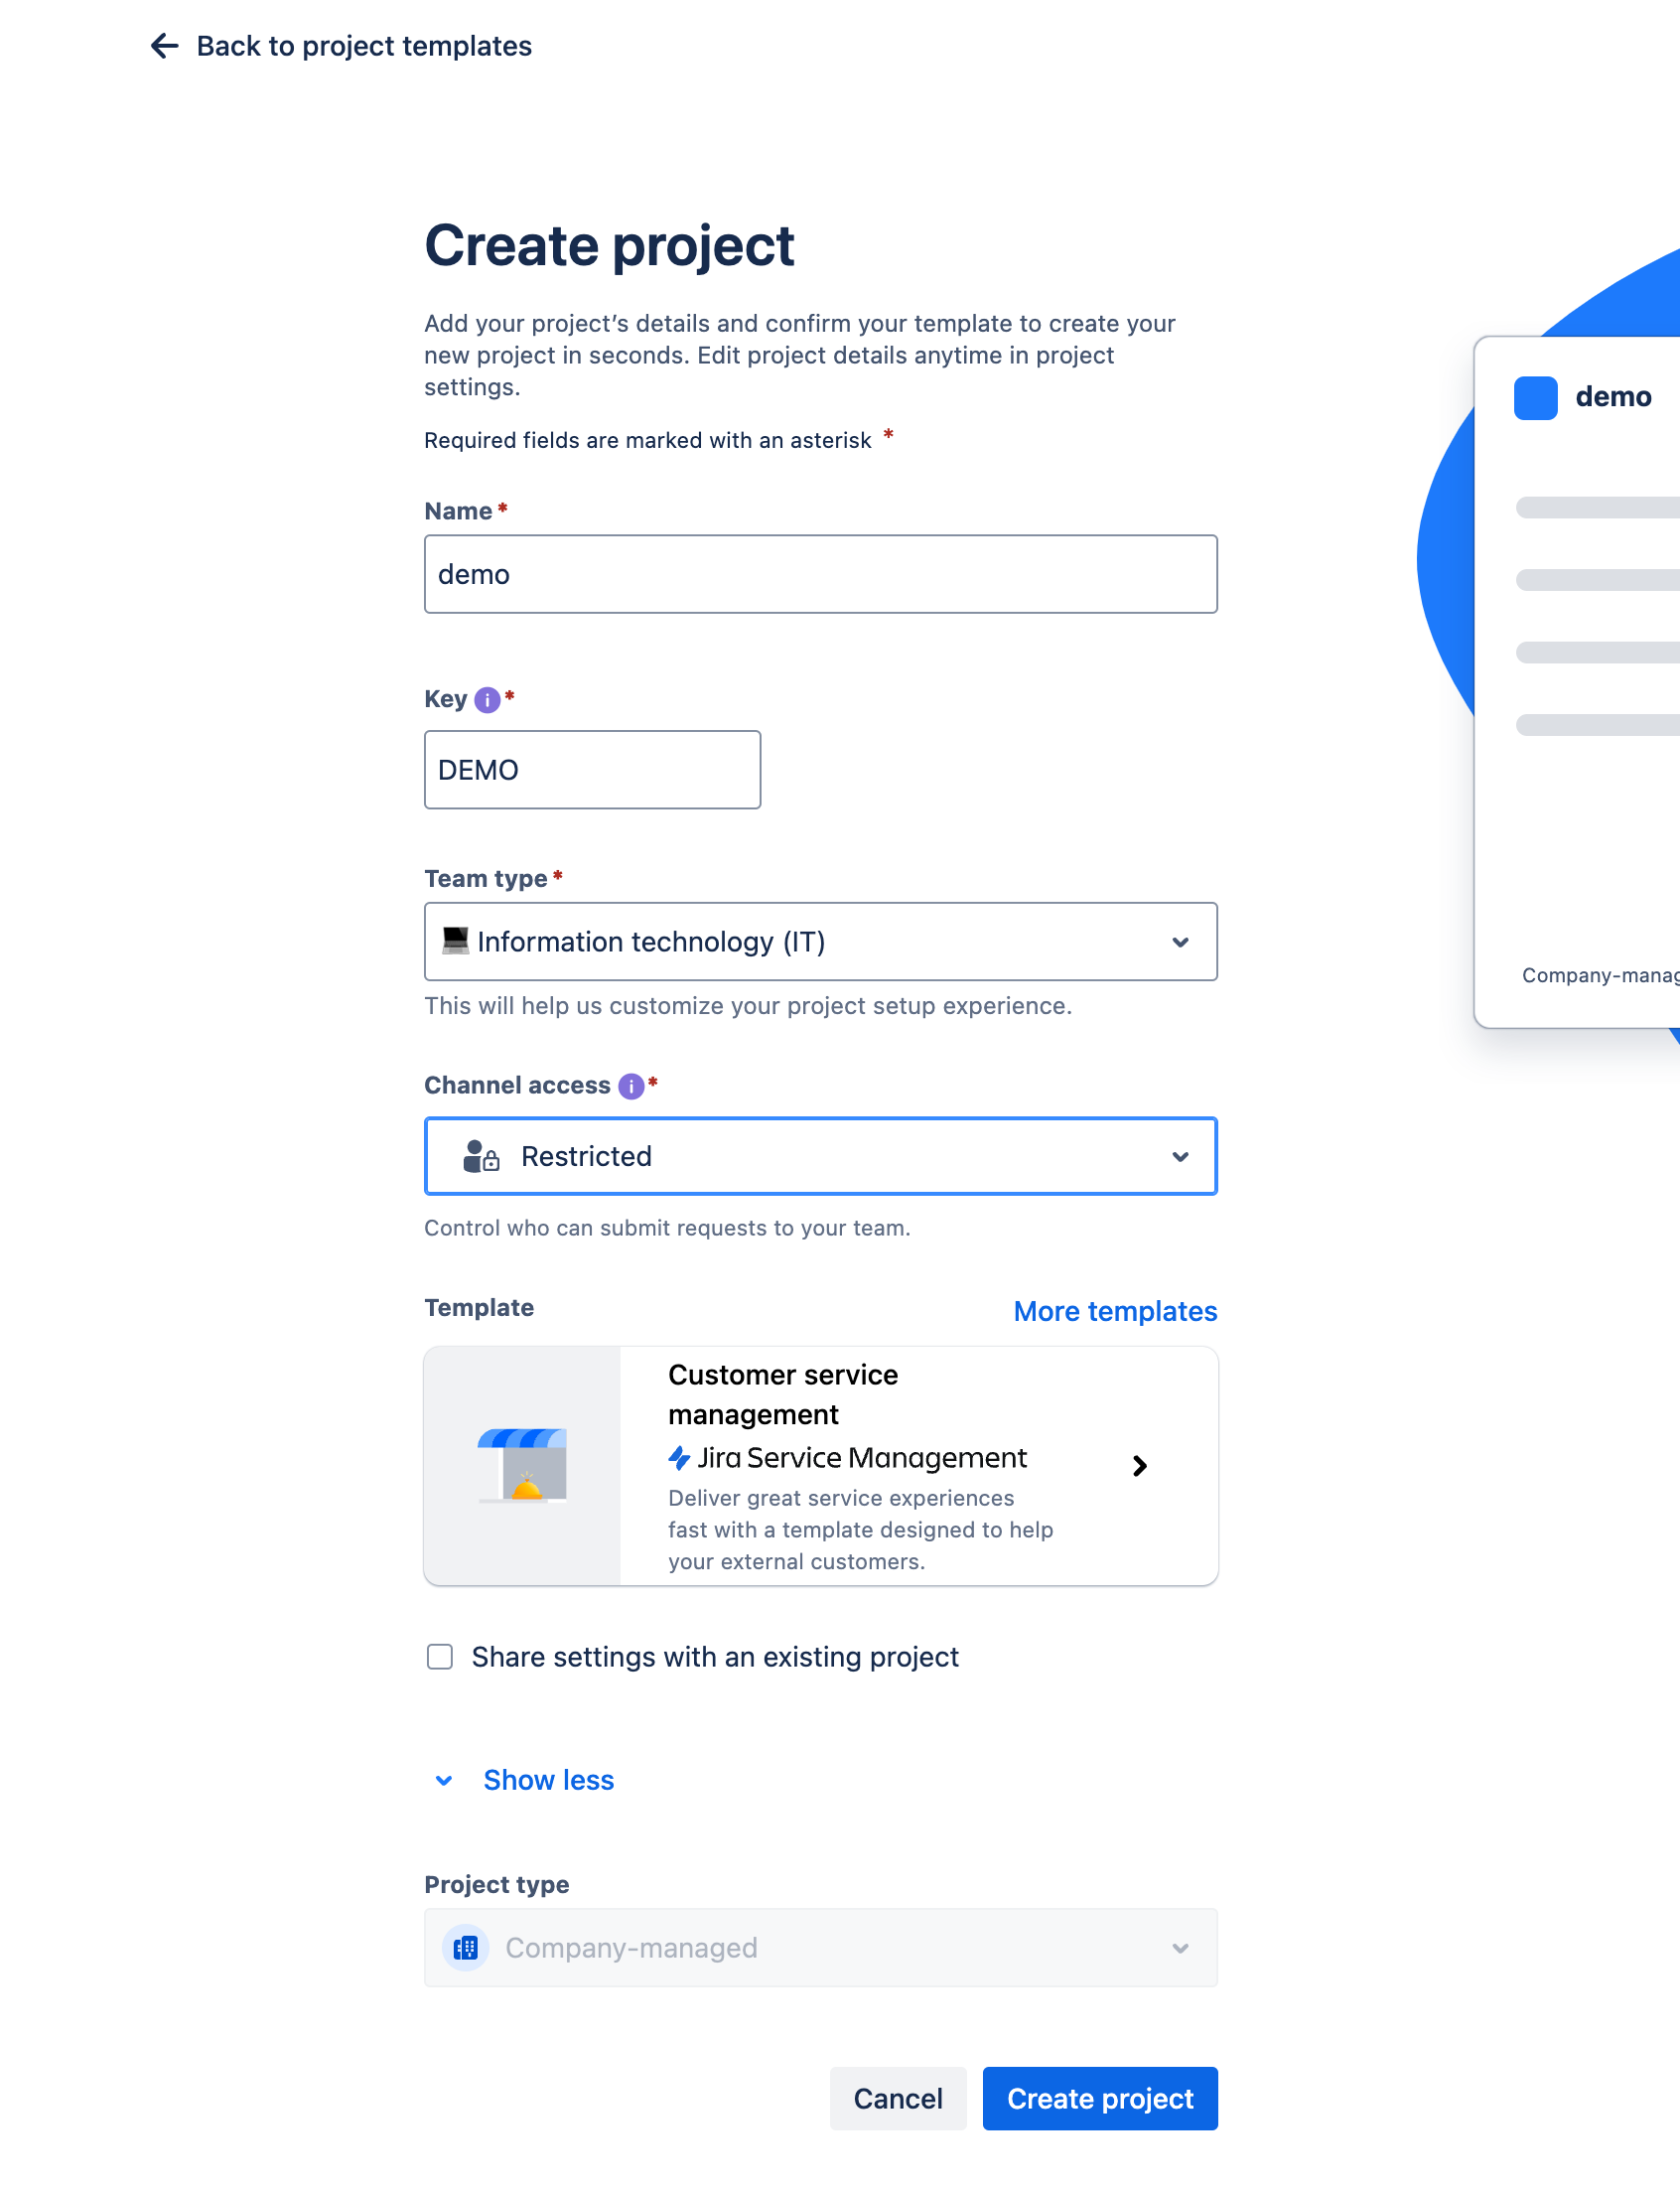
We are now at the point where specific information about the project needs to be provided (most of these can be changed later if needed).
- Name - what you want the project to be called
- Key - this will be automatically populated from the name, but you can override it. This code must be unique within your Atlassian account as it is used as a prefix for tickets and is part of the URL for your project and external facing portal
- Team type - select based on your business use case. I am selecting Information Technology (IT)
- Channel access - defaults to Open, which means anyone with your portal URL can submit a request or raise an Incident. I always start with Restricted and open up access when the project is launched
- Template - you can select another template type or just with a blank project
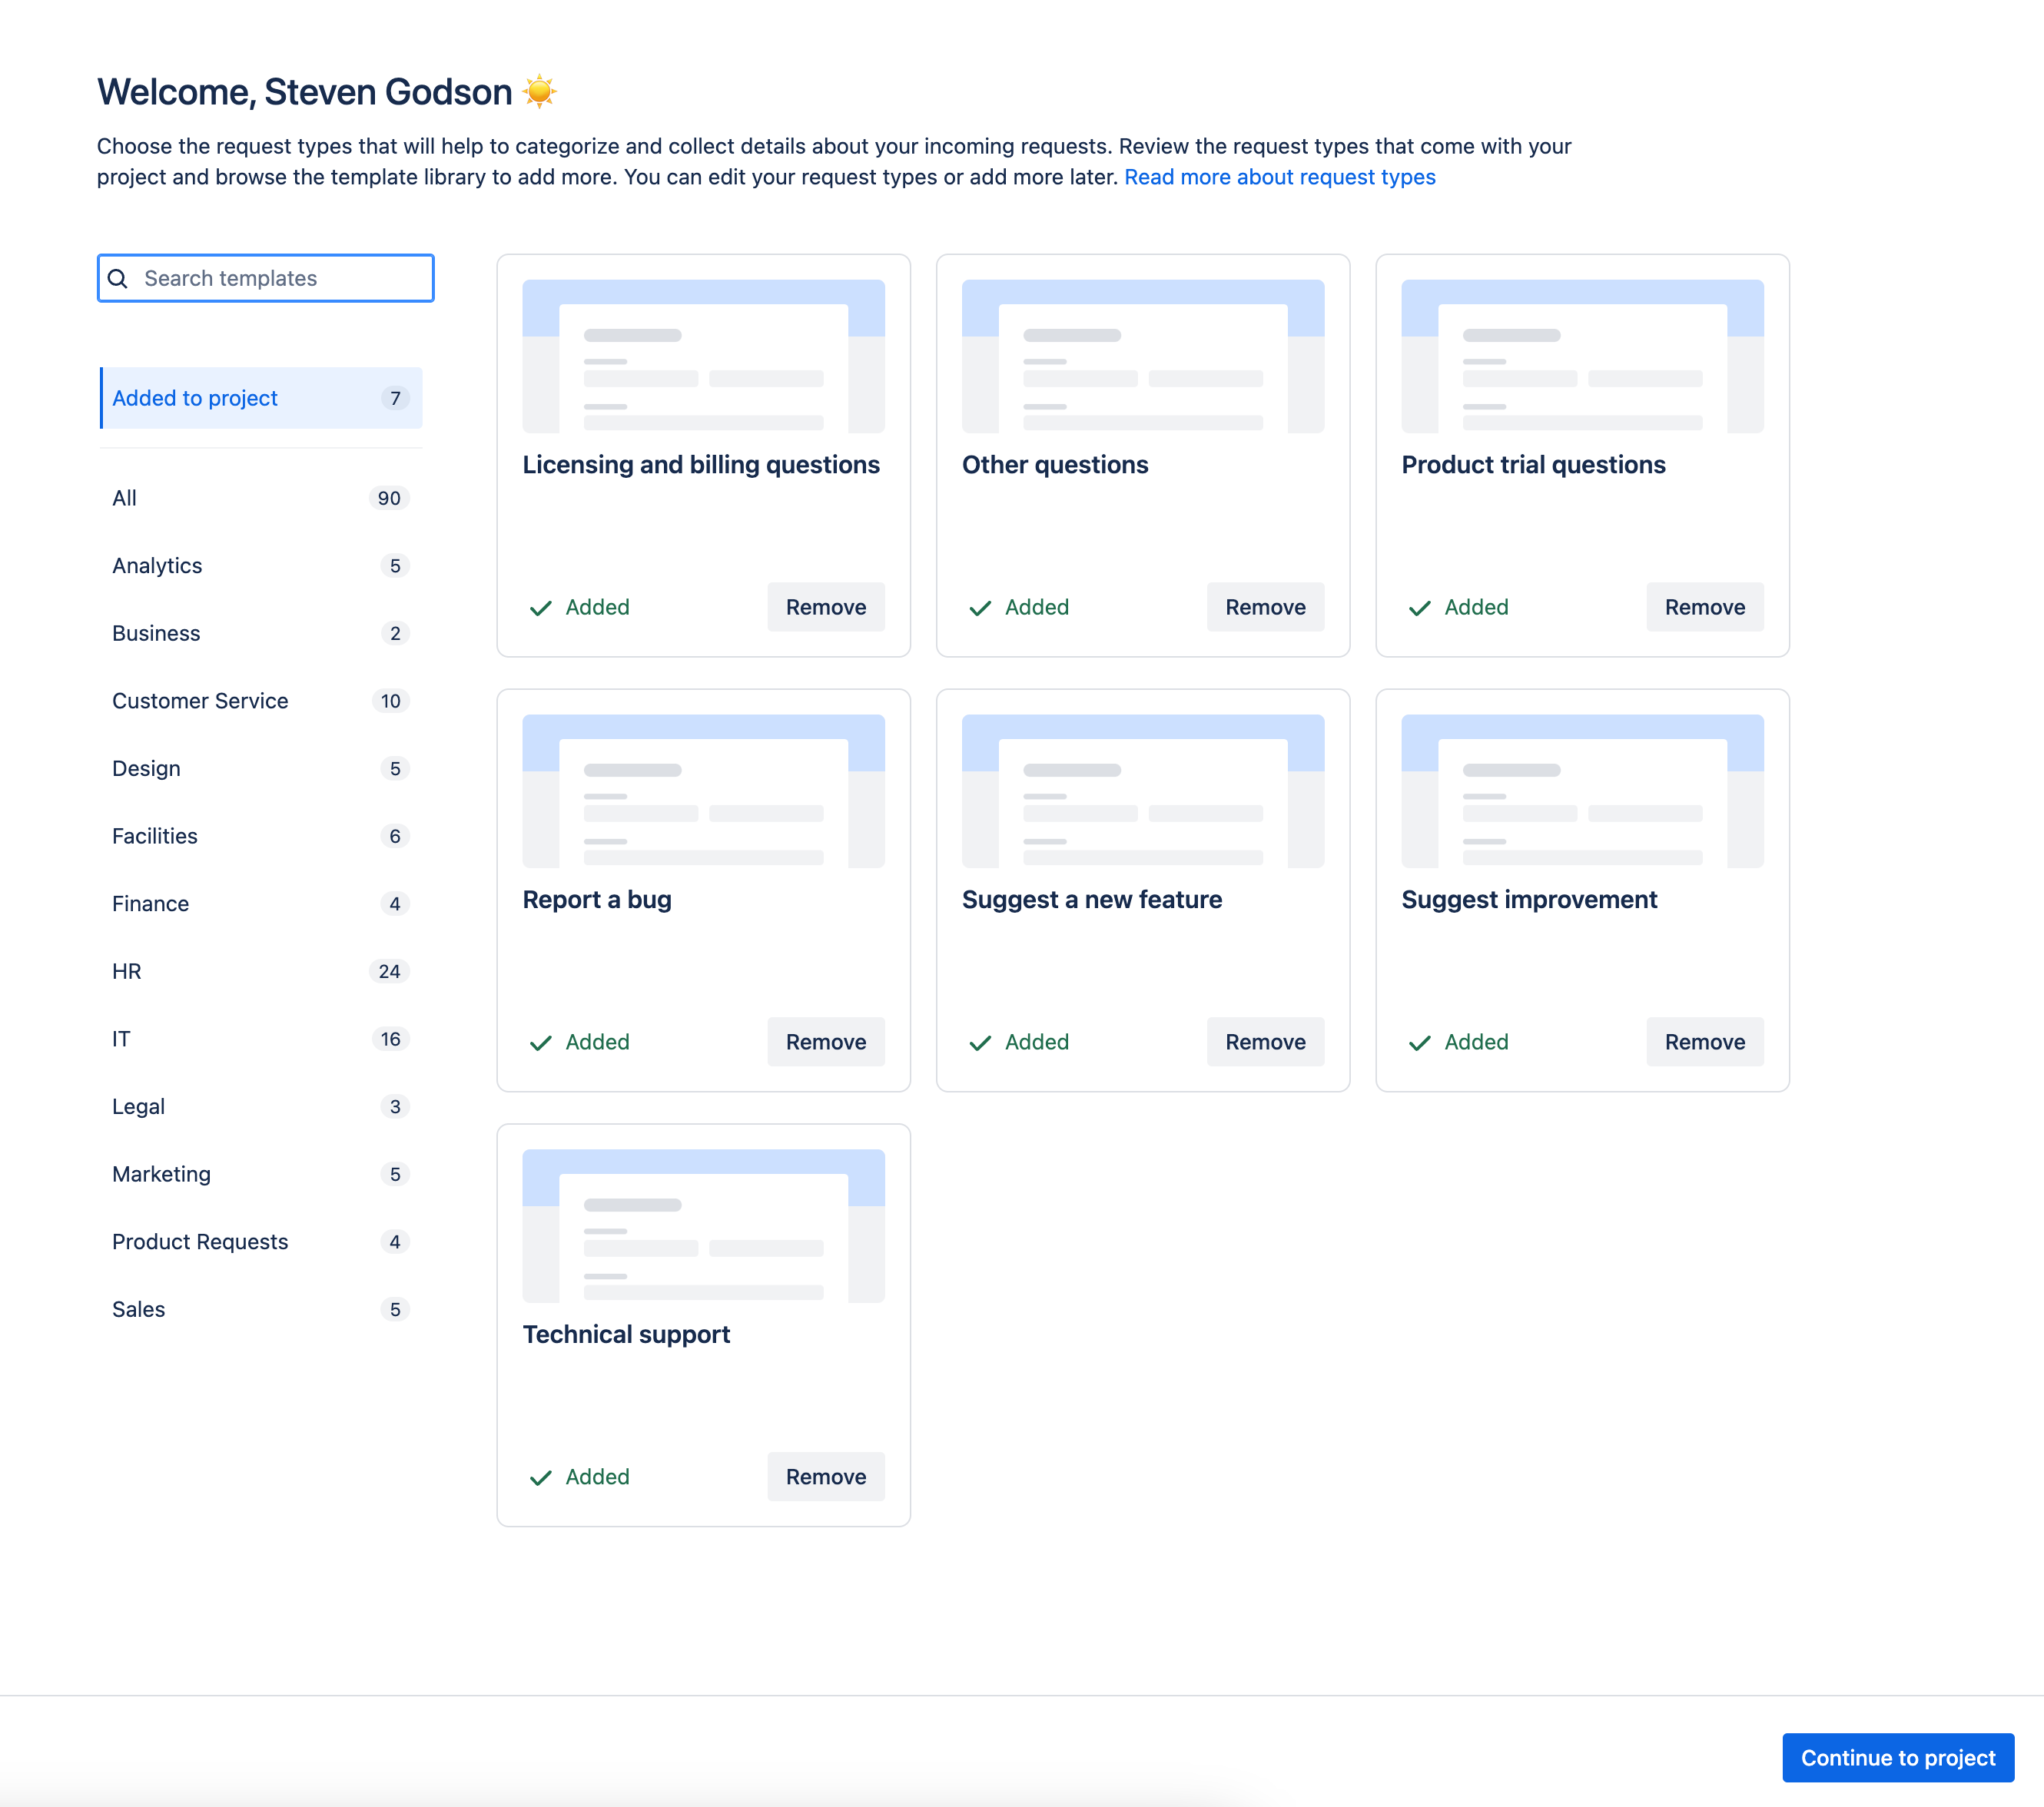
Once you click on Create Project you are presented with the Service Request types that come with the template. I recommend investigating these and choosing those appropriate to your business use case. To get the most out of these you may need to switch on specific functionality for IT Service Management (ITSM) specific processes e.g. Incident Management, which come with pre-defined workflows.

Once you have you completed your selection (you can always revise later) click on Continue to project. You will see the projects Get Started screen.
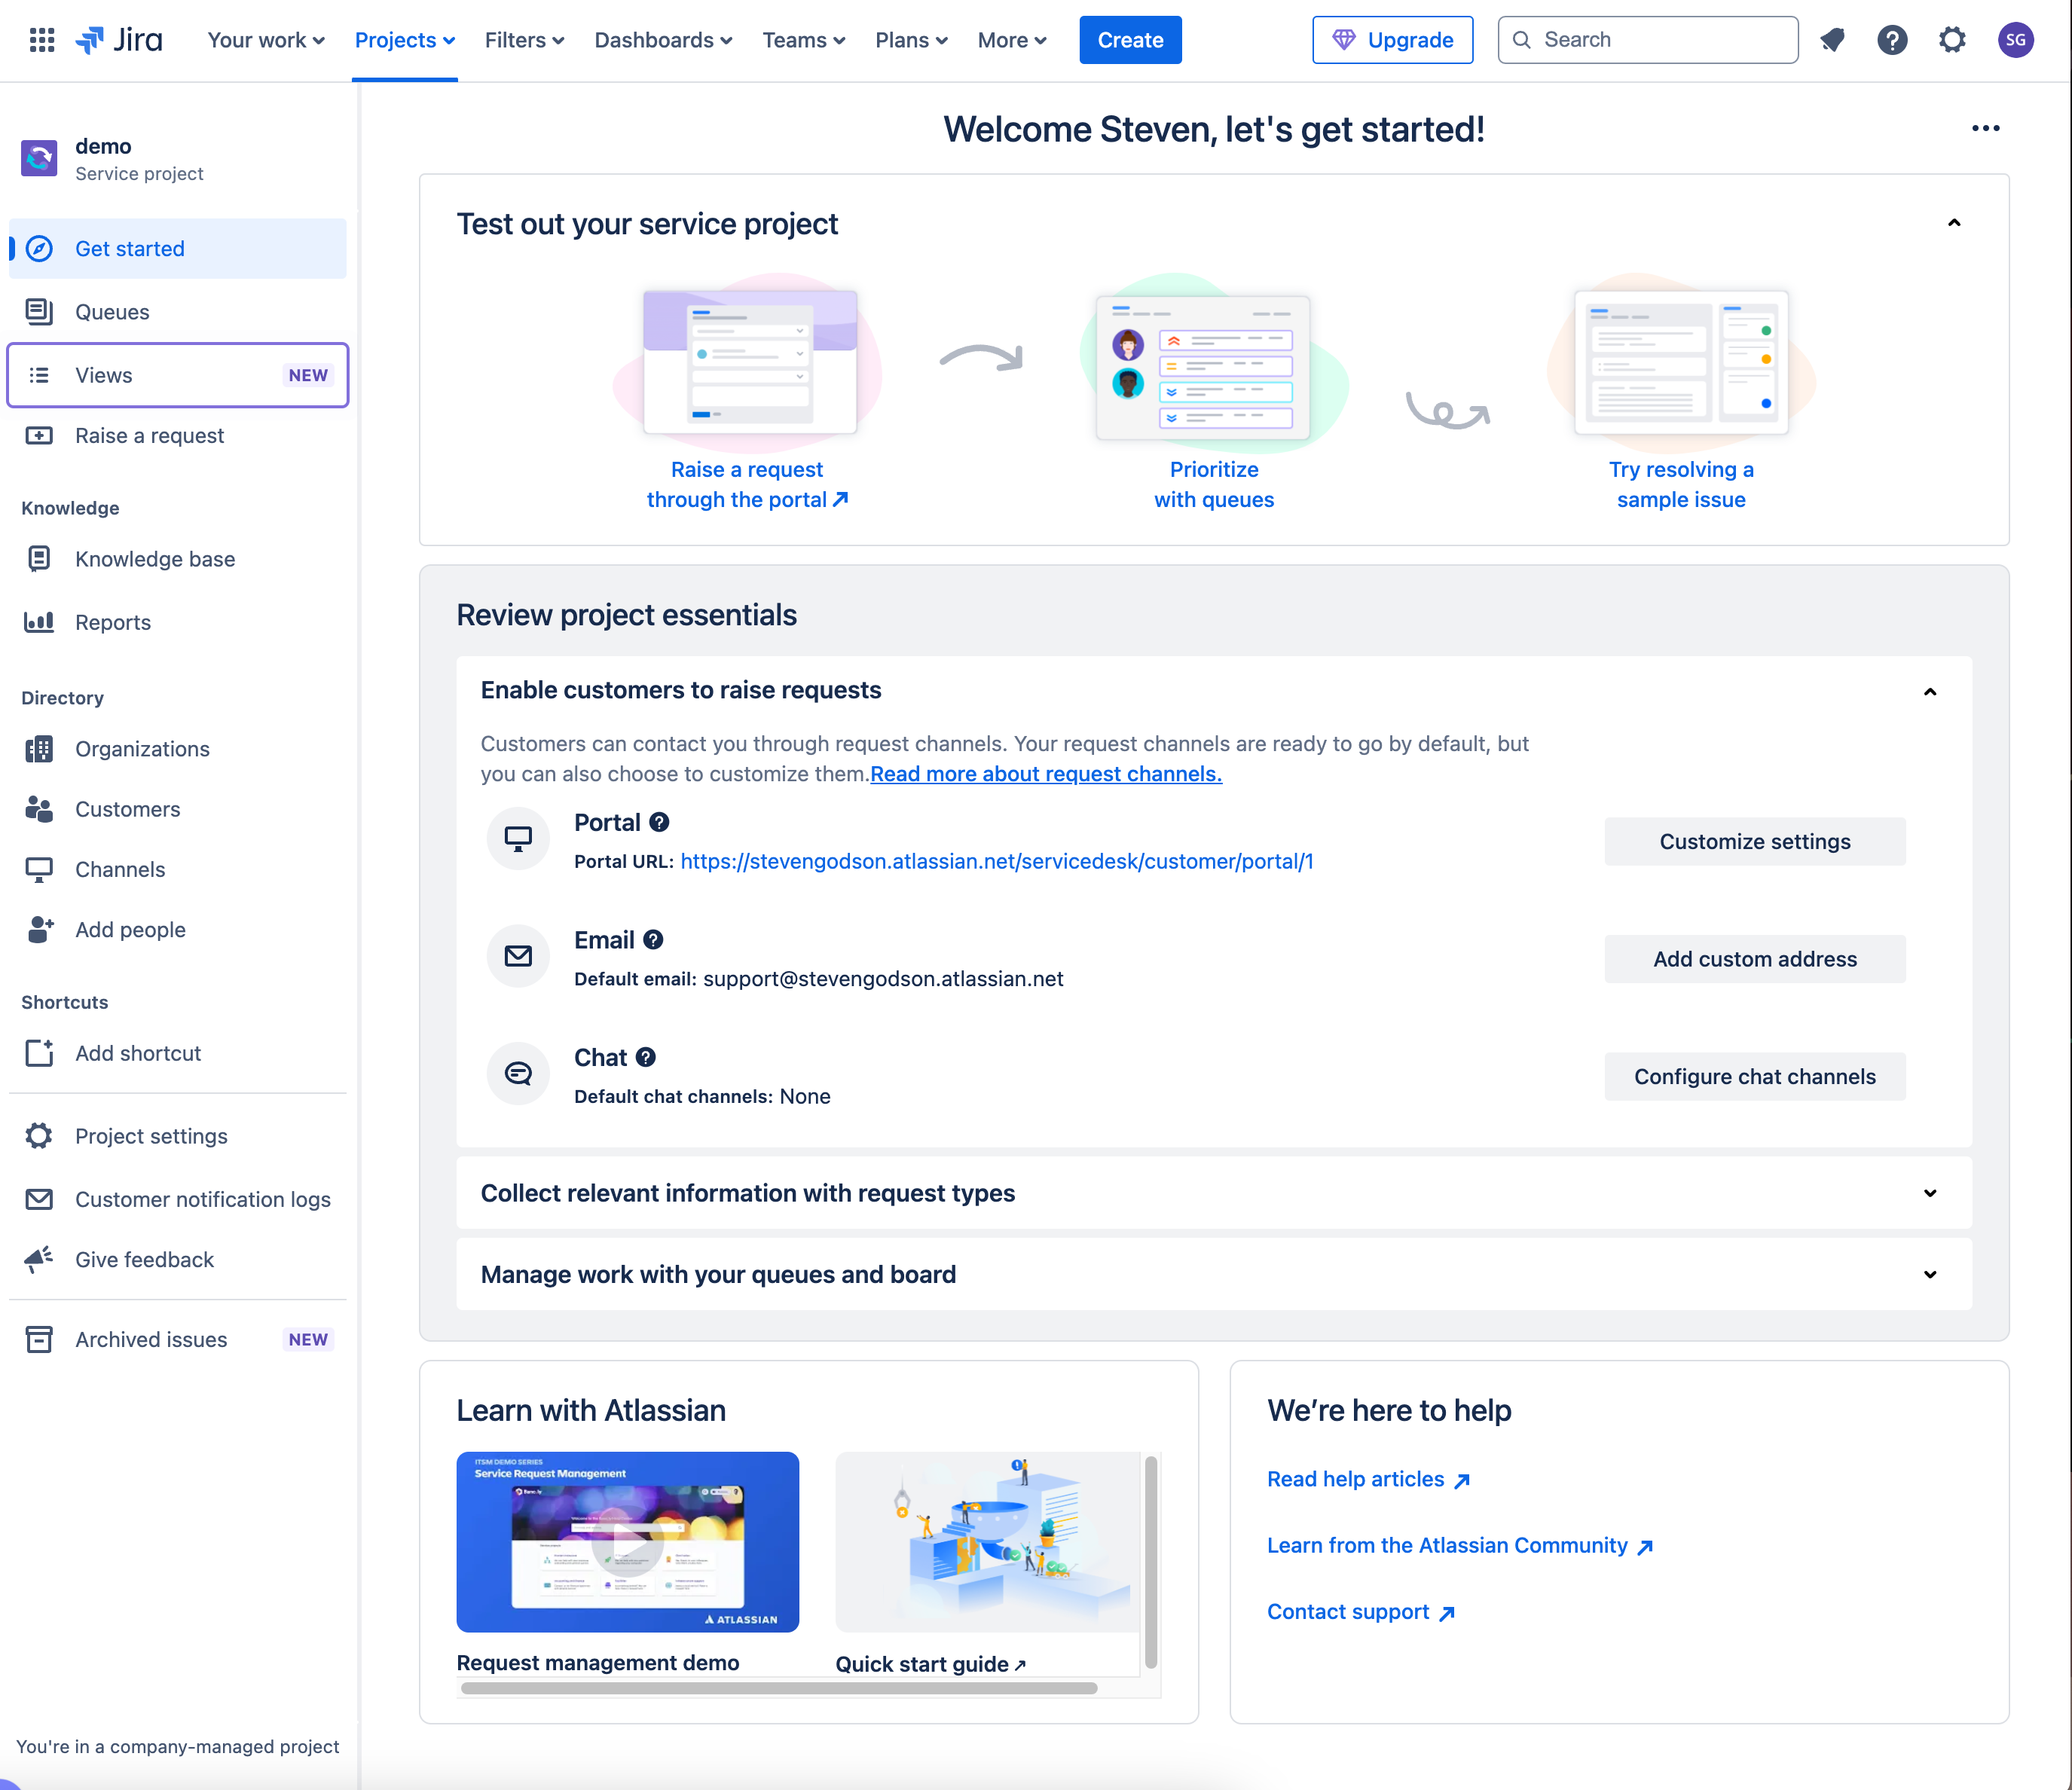
Getting Started
In this section we will go through the specifics of the Getting Started screen.
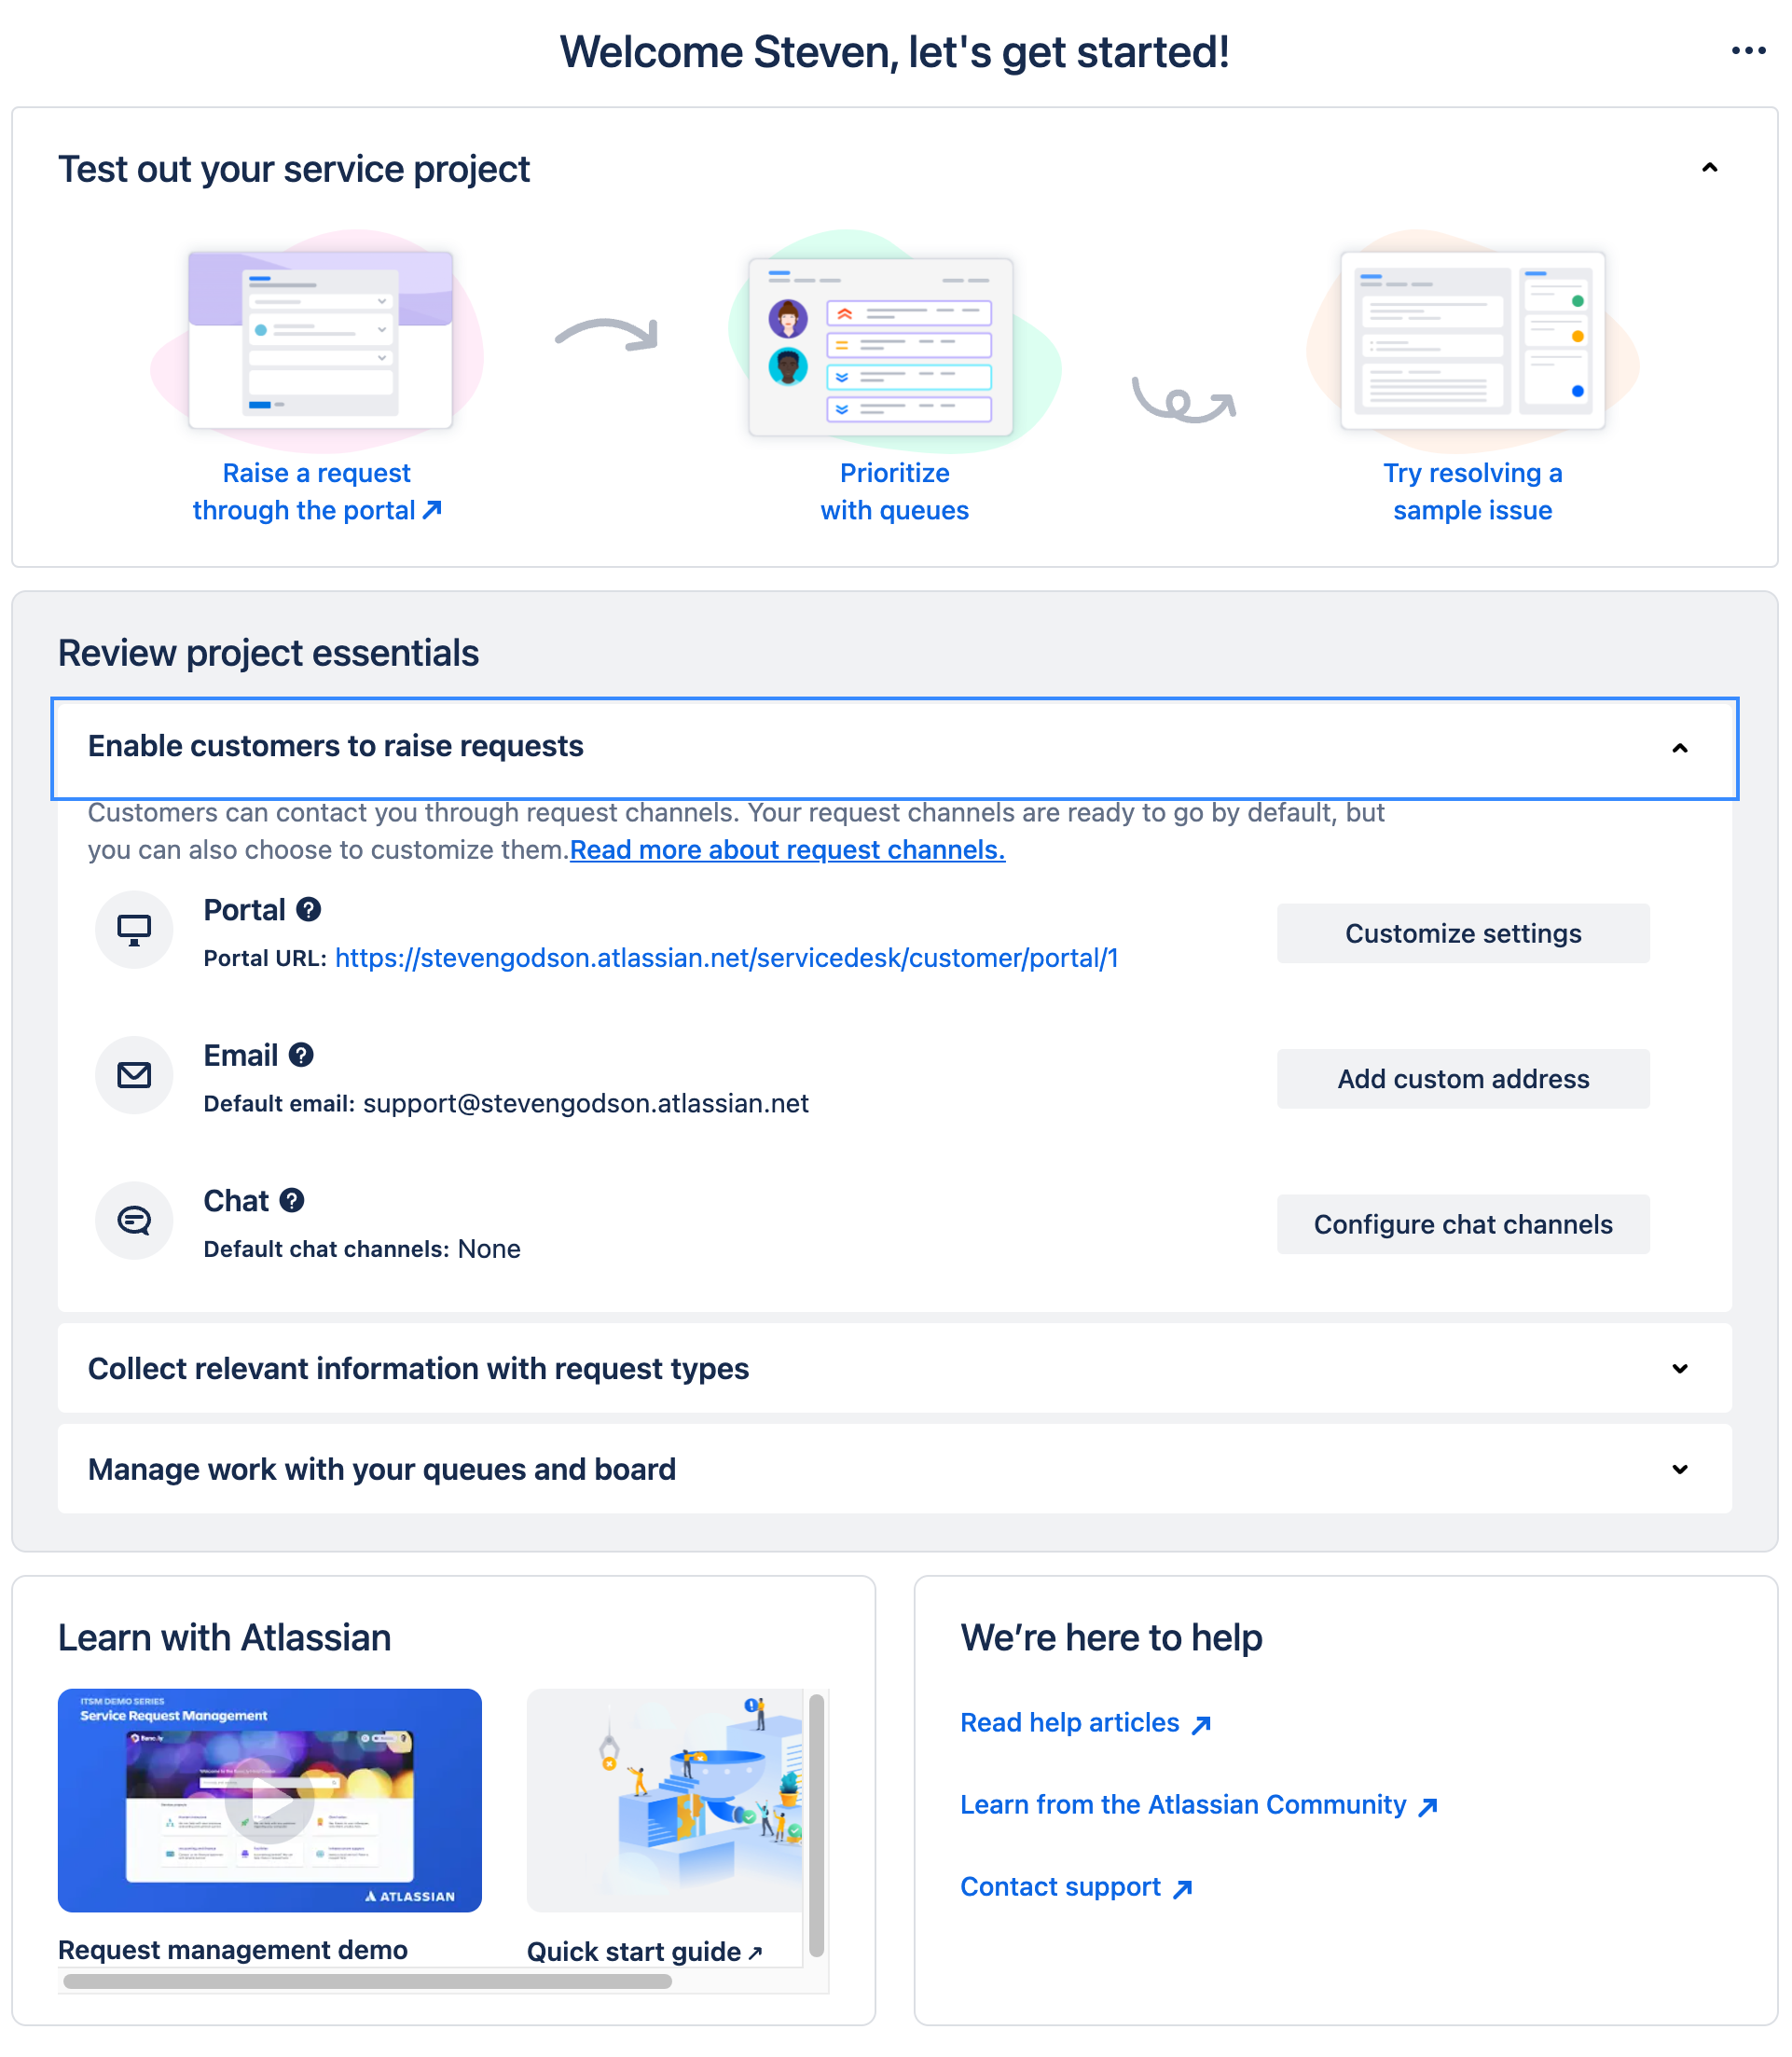
The first section of this allows you to walkthrough raising a request, prioritising it using the queues available in JSM and then resolving it. It is quite intuitive so I will not being going through this.
The second section allows you to review essential project configuration data, and consists of three sections.
- Enable customers to raise requests - these are your engagement channels
- Collect relevant information with request types - here you can review your request types and add/remove fields so that the data collected matches your business requirements and data model
- Manage work with your queues and board - this section allows you to review the views that you have for managing requests and Incidents
The third and final section provides links to Atlassian guides, tutorials, community and support pages. These are generally quite good, the ones that I have used at least, so well worth exploring.
Now we will look at the middle section in greater details and discover what the possibilities are.
Enable customers to raise requests
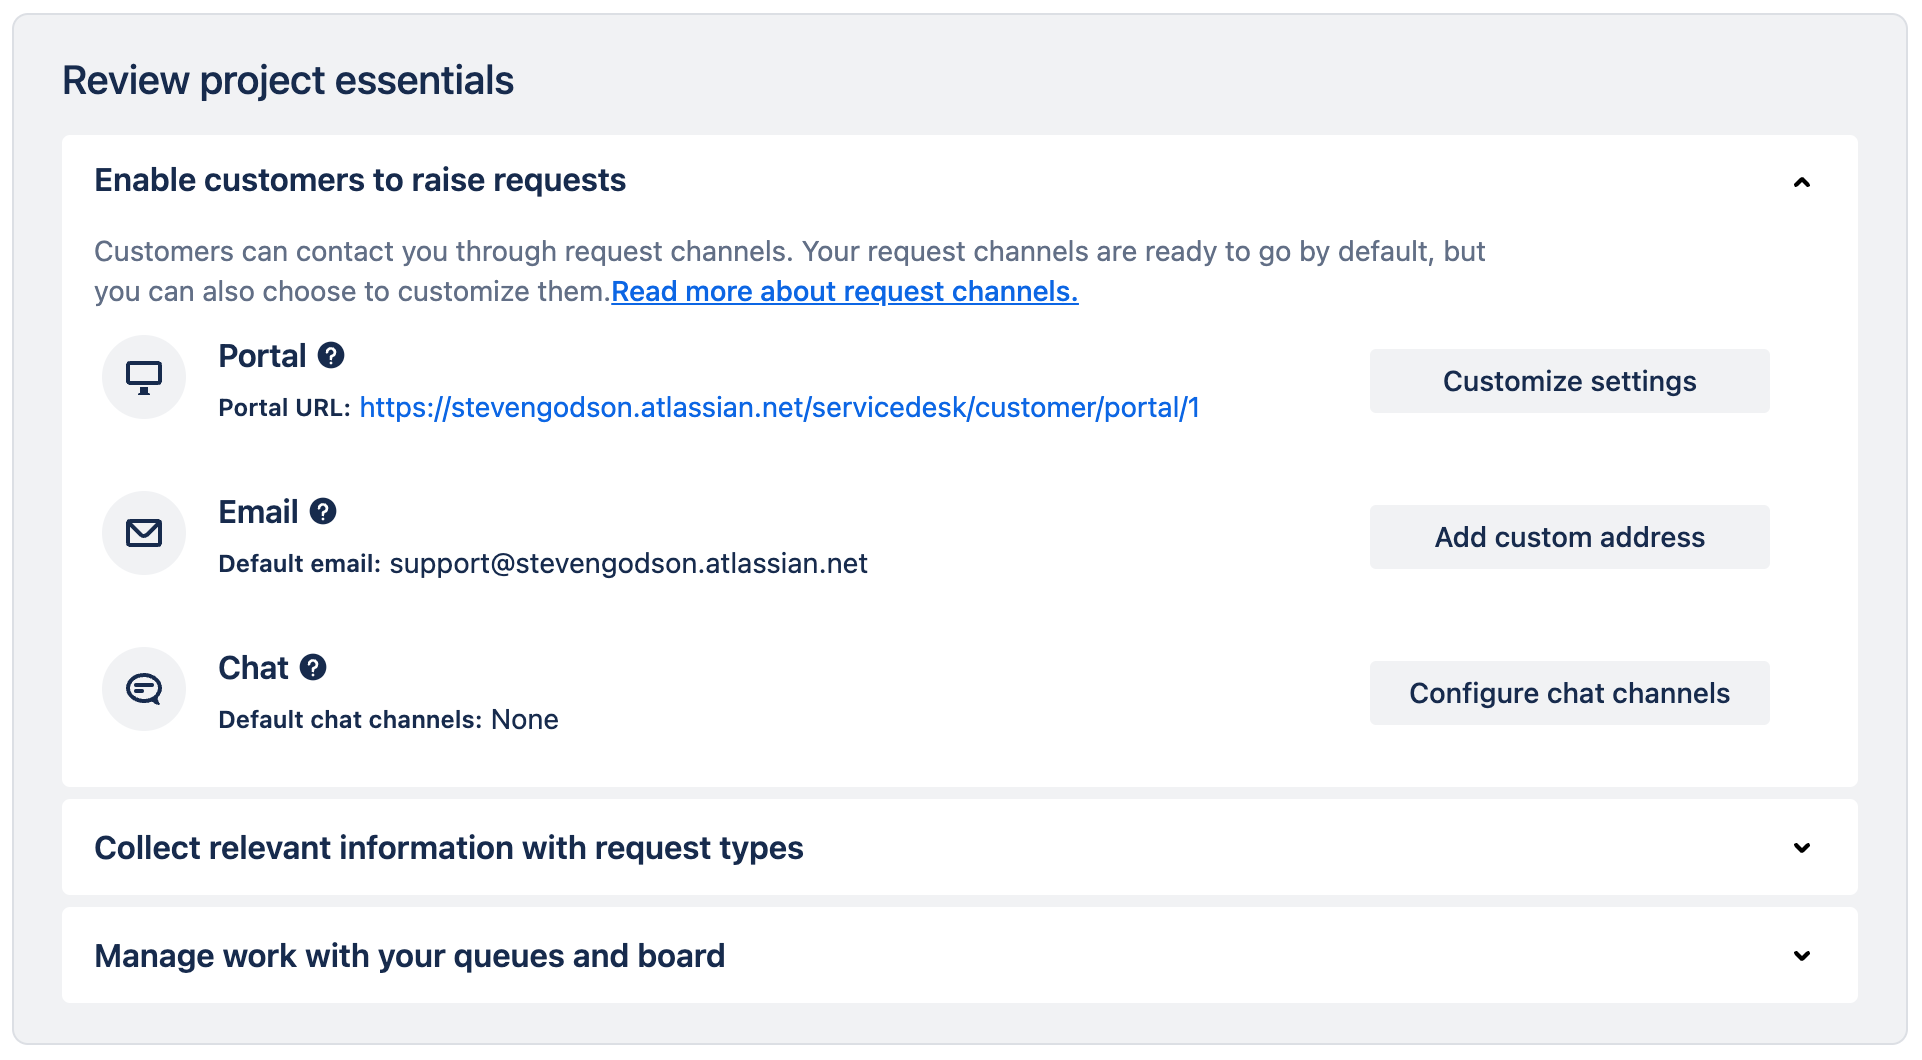
This section covers three modes of communication that your customers can engage through. First is the Portal, which a web front end where your customers / users can raise Incidents, requests and search knowledge articles. If we click on the Customise Settings button we are taken to a section or the Project Settings that is specific to the Portal. This section has two tabs where choices can be made.
Portal
Portal Configuration
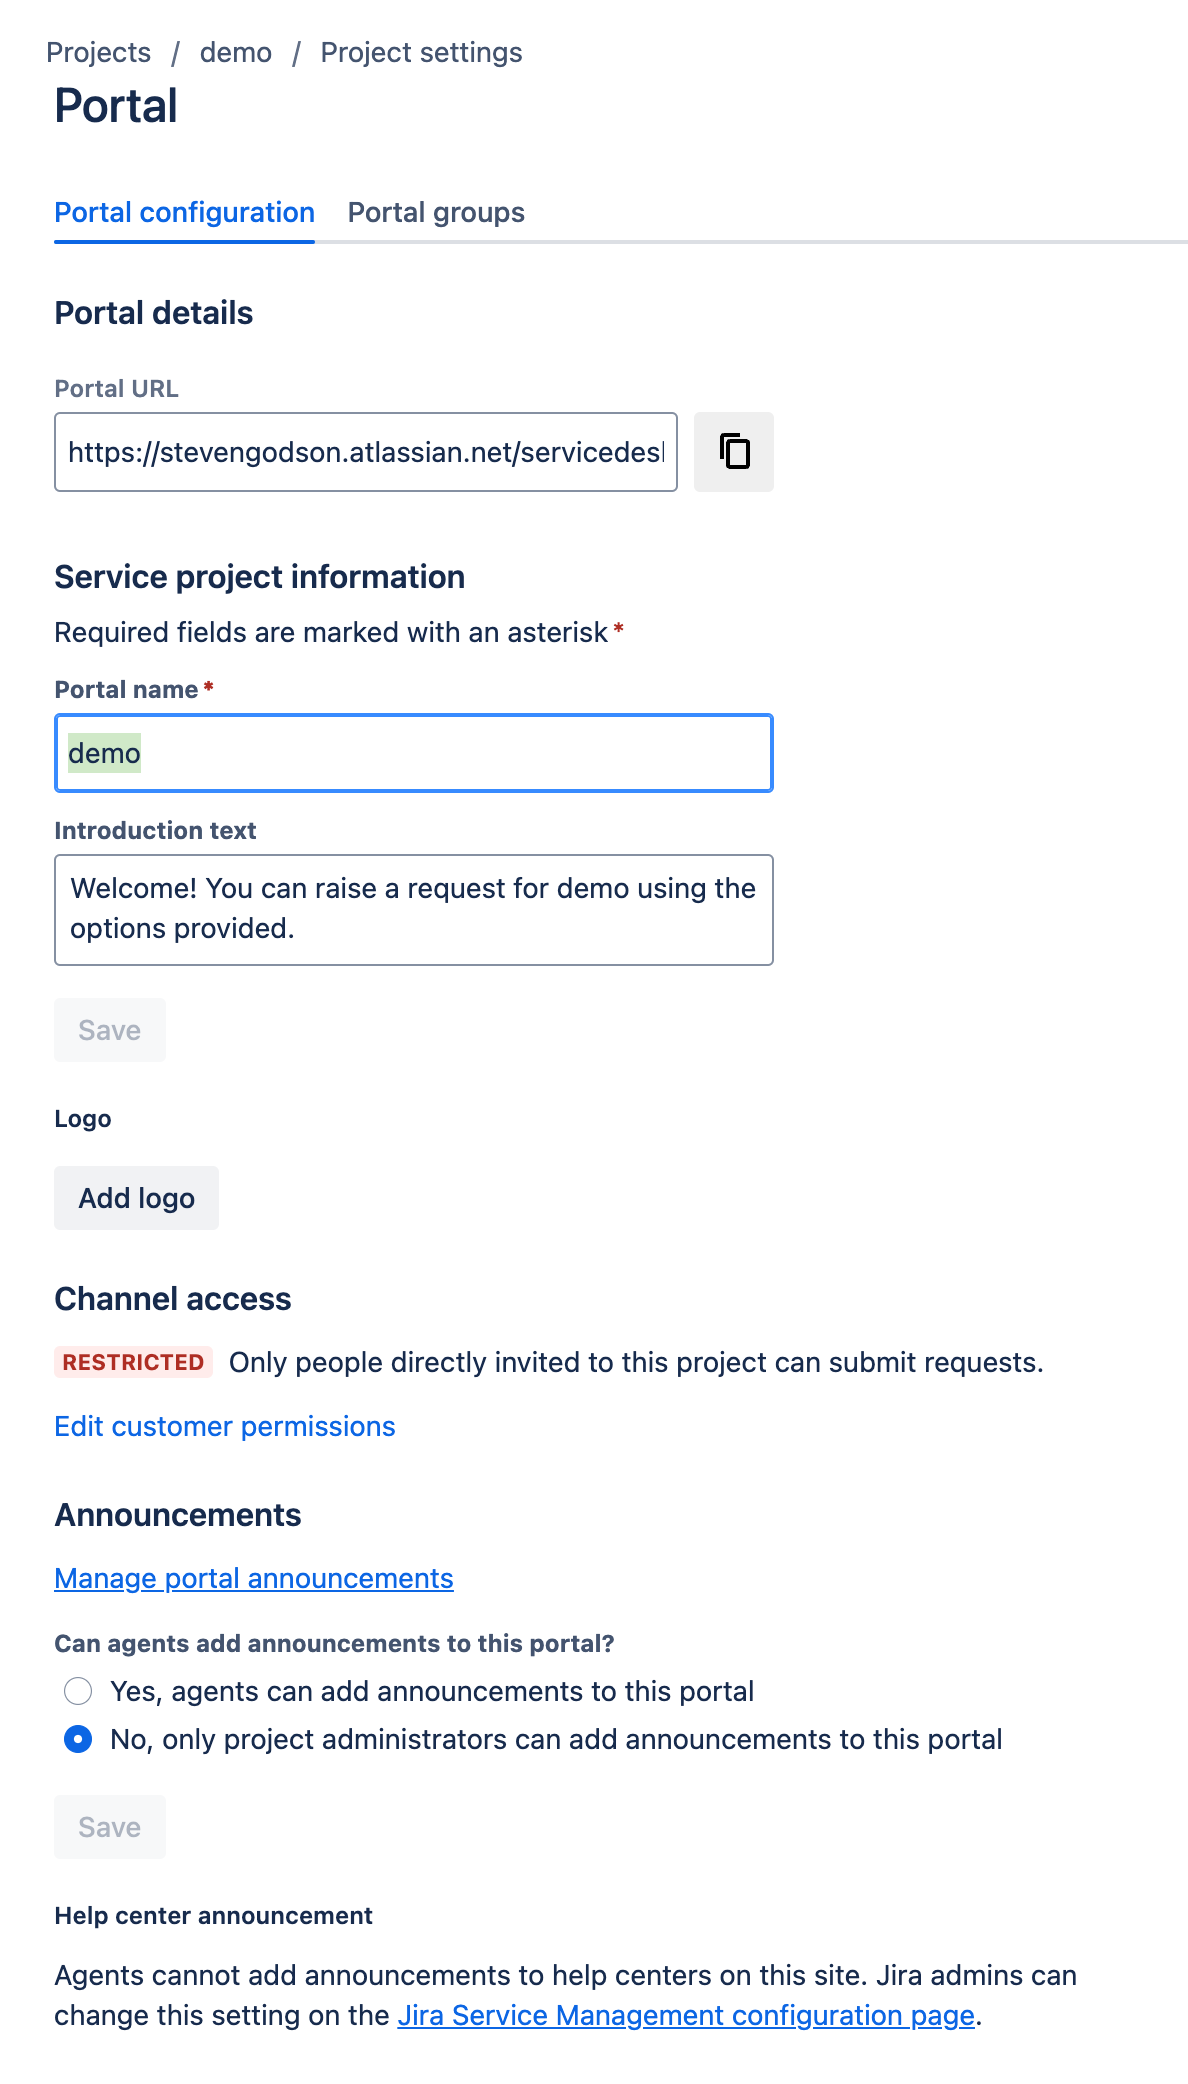
- Portal URL - this is the link to your external facing portal for your service desk
- Service project information
- Portal name - a mandatory title for your service desk project, this is visible internally and externally
- Introduction text - the text that customers / users will see under the service desk project (Portal) name
- Logo - allows you to add a logo to the portal which will sit beside the portal name
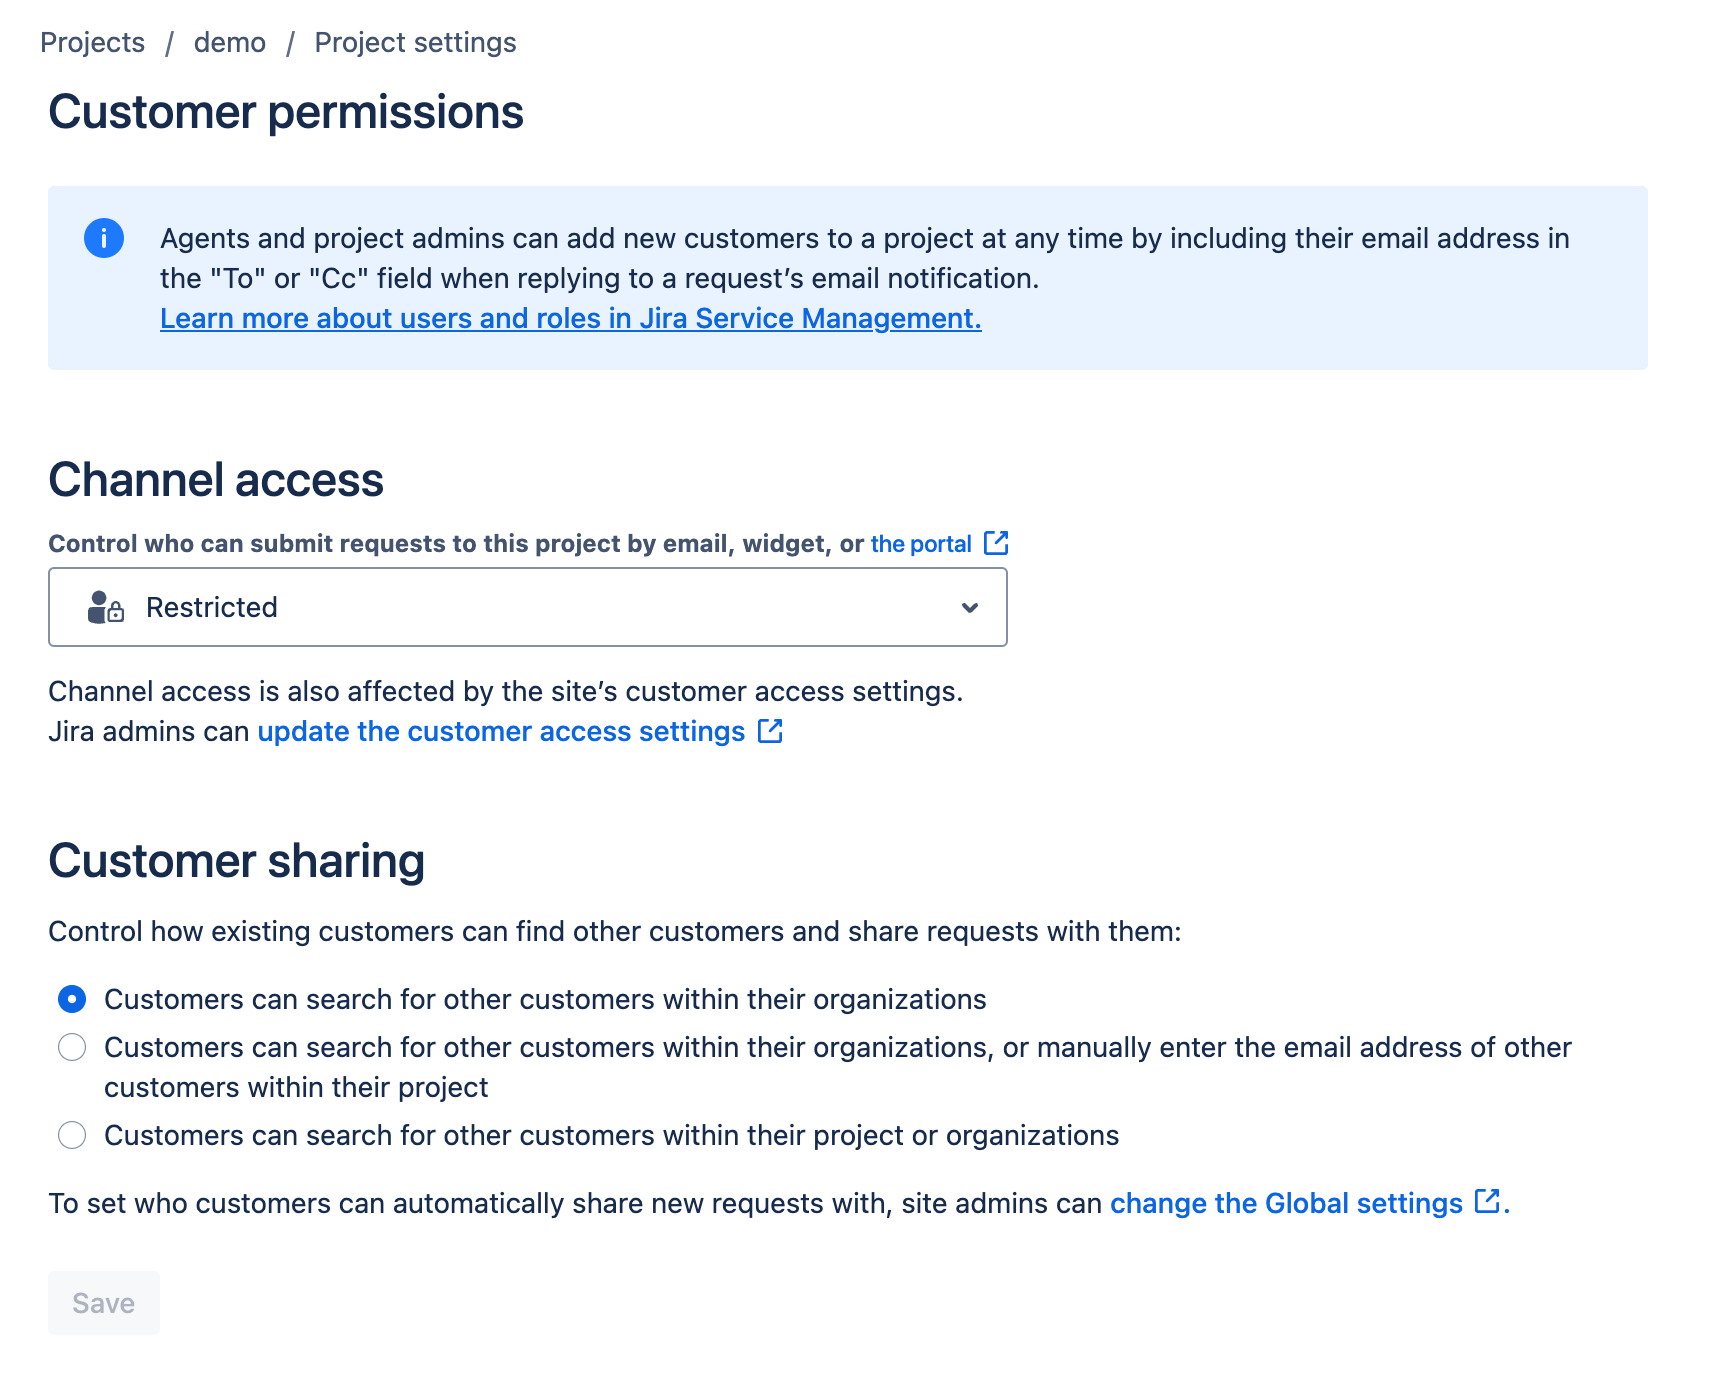
- Channel access - clicking of Edit customer permissions opens a new page where you can
- Decide who has access to the portal, and other engagement routes, e.g. Restricted to users who have been given access or Open to anyone who has the link
- Decide what customers can see within the project. This very much depends on whether your service desk project supports multiple customers or just one and the data privacy regulations that you need to comply with
- Announcements - controls who can add banner announcement messages to the portal e.g. notifying users of an upcoming service outage or major Incident
Portal groups
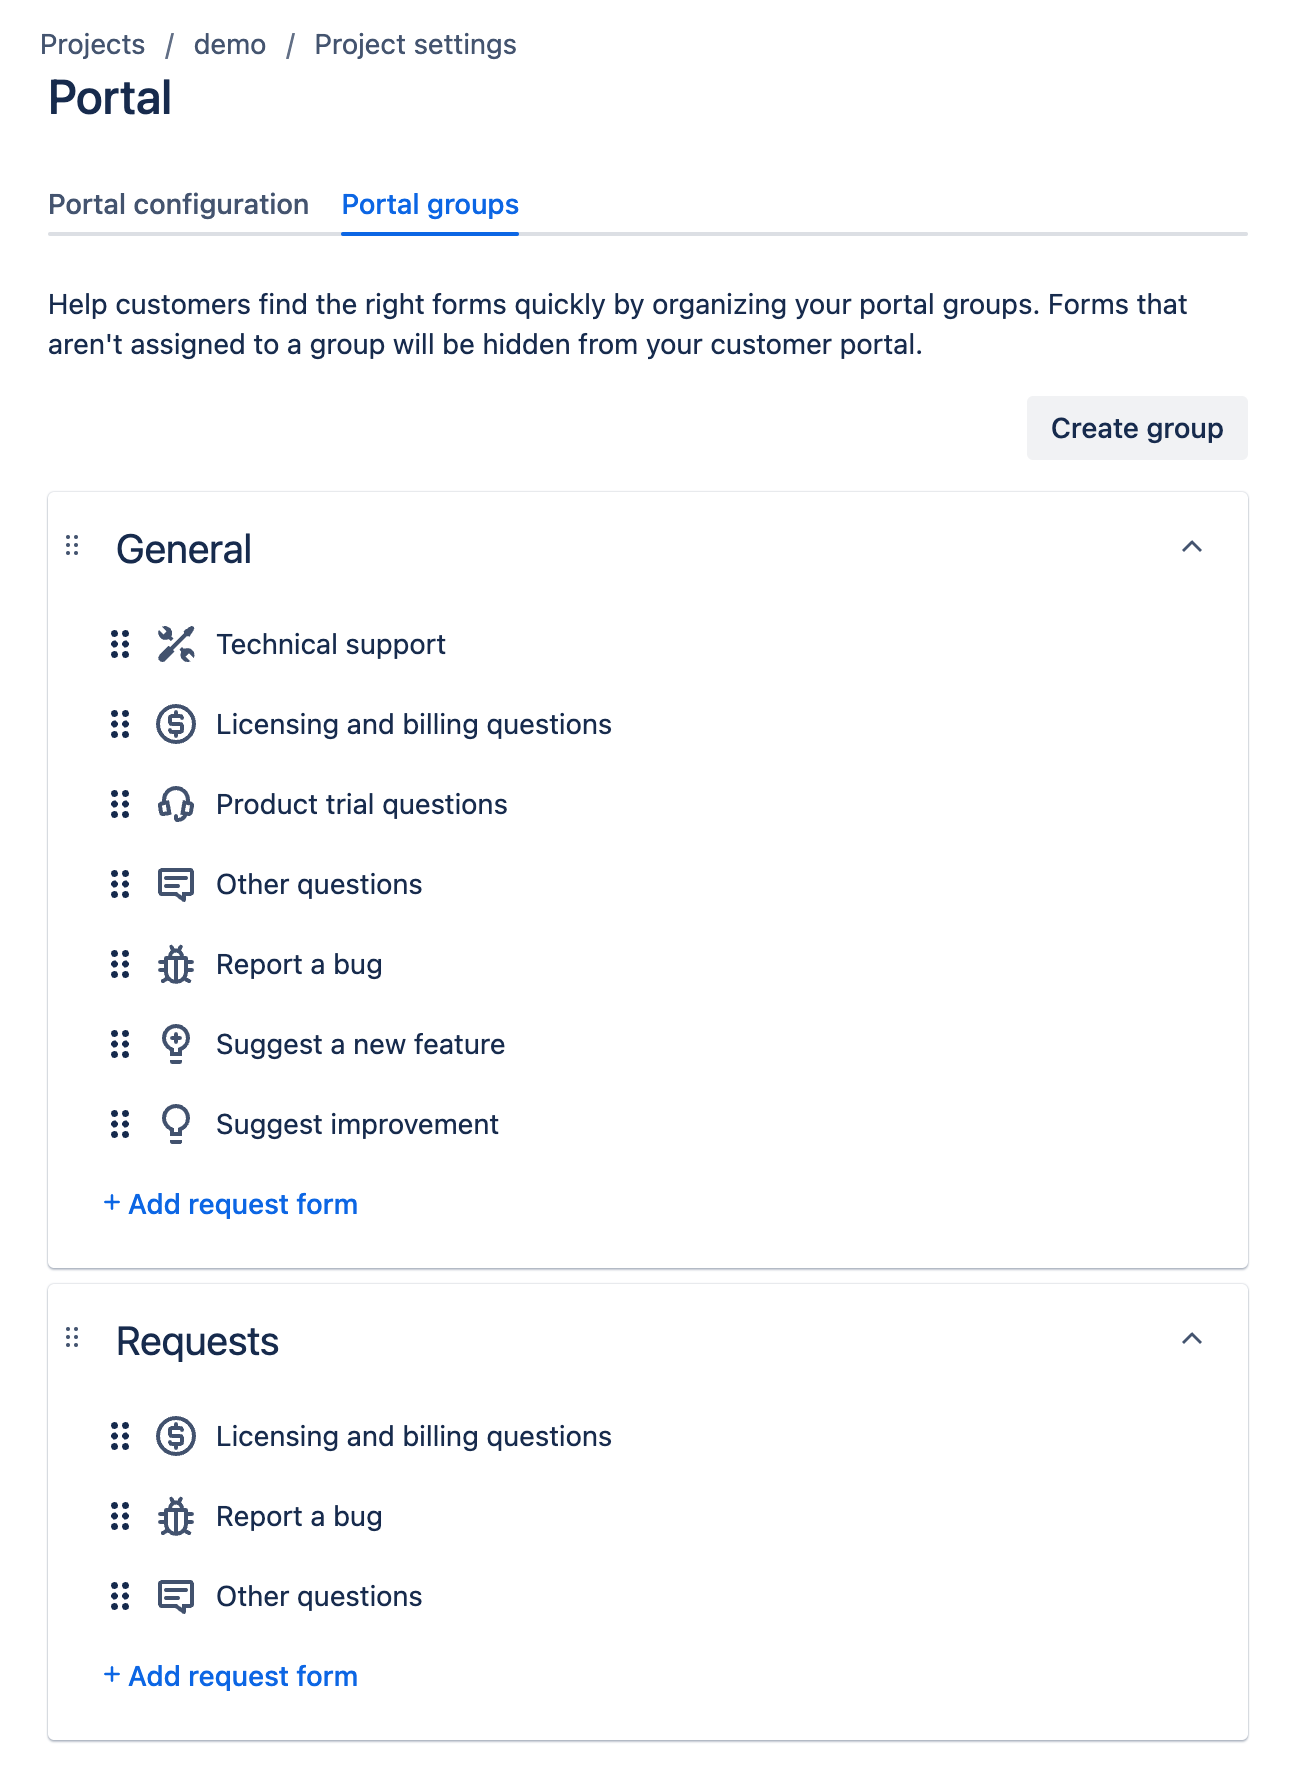
This tab allows you to add sections to your portal to enable a logical grouping of request types e.g. Incidents, Requests, Changes etc. By default it comes with the General group populated with 7 request types, assuming you have that many in your project. The groups can be re-ordered by clicking on the top left of a group tile and dragging around the page
Final View
Once you have configured your portal you can use the Portal URL to see what it looks like. I recommend making changes incrementally and checking the portal after each change so you can see the results in real time.
Below is a simplistic view of where your changes will be visible.
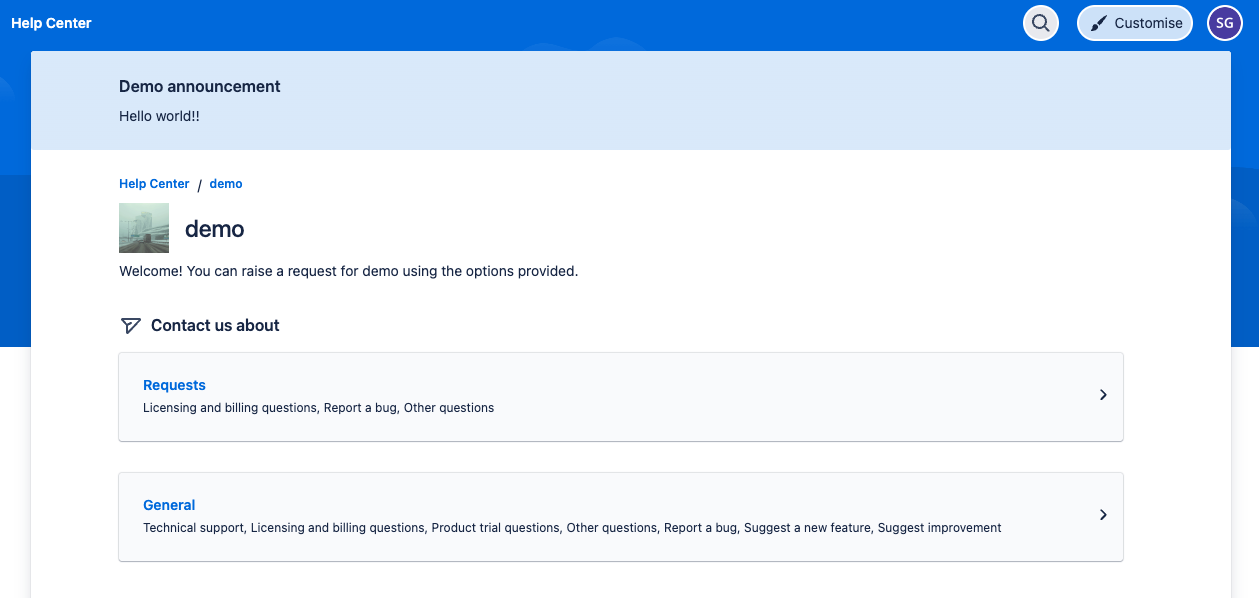
If you look at the top righthand corner you will see me logged in as a user, a search icon and a Customer button, the latter only being available to those with permissions to add announcements.
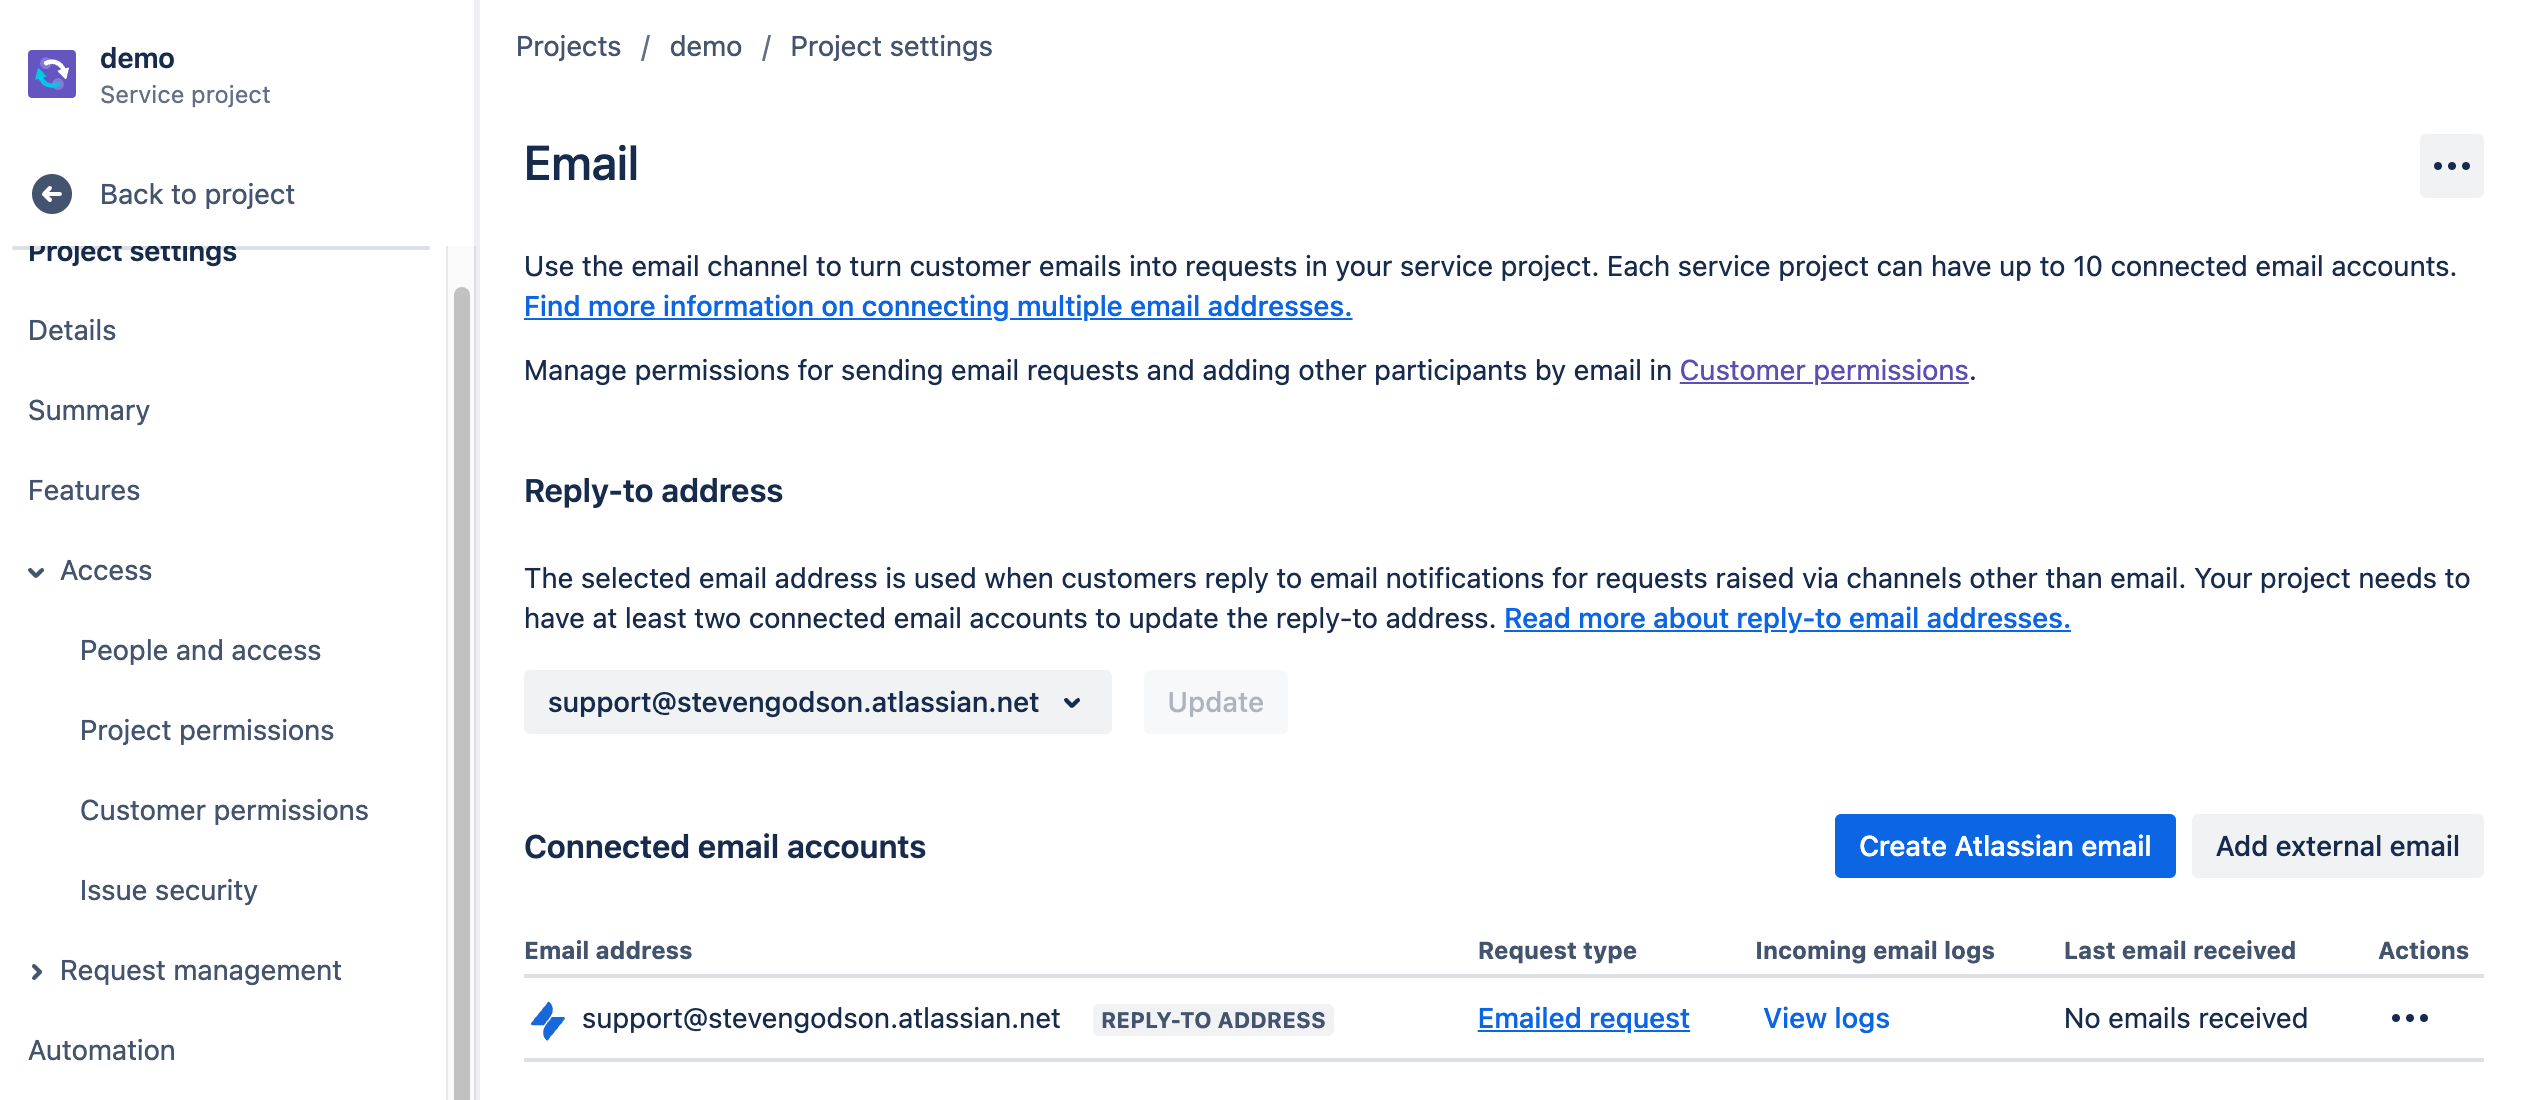
The Email section provides the capability to manage the email addresses that customers / users can use to report issues and request services.
The default email address is support@[your-account-name].atlassian.net. However, this can be amended by clicking the ellipsis, under the Actions heading, and selecting Edit. This opens the following pop-up from which the email address name can be amended and the Request type that will automatically be created upon receipt.
You will notice that the Request types in the drop down field represent the full list of Request types that were created earlier in this article.
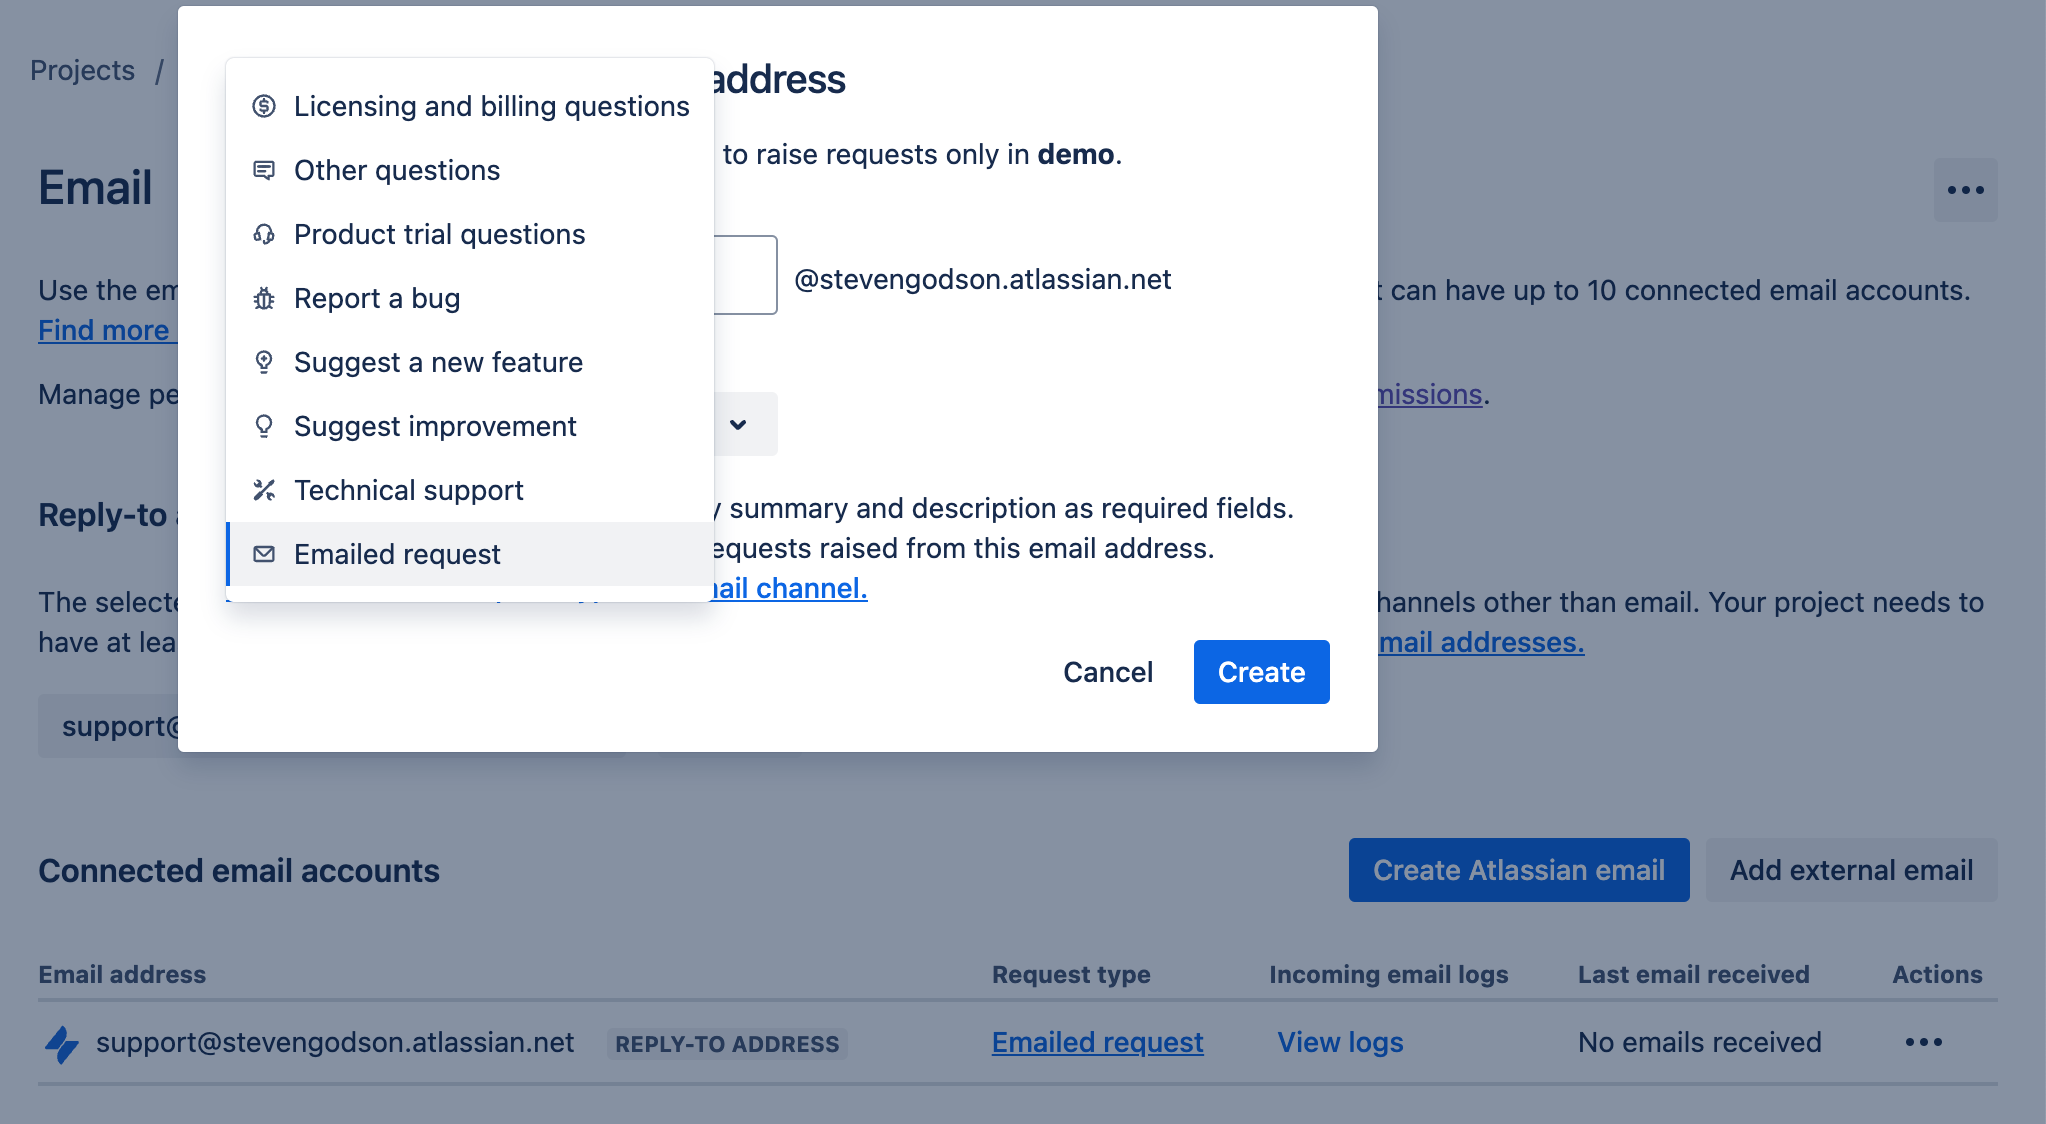
If you want to create multiple email addresses then click on the Create Atlassian email button which opens the same pop-up form.
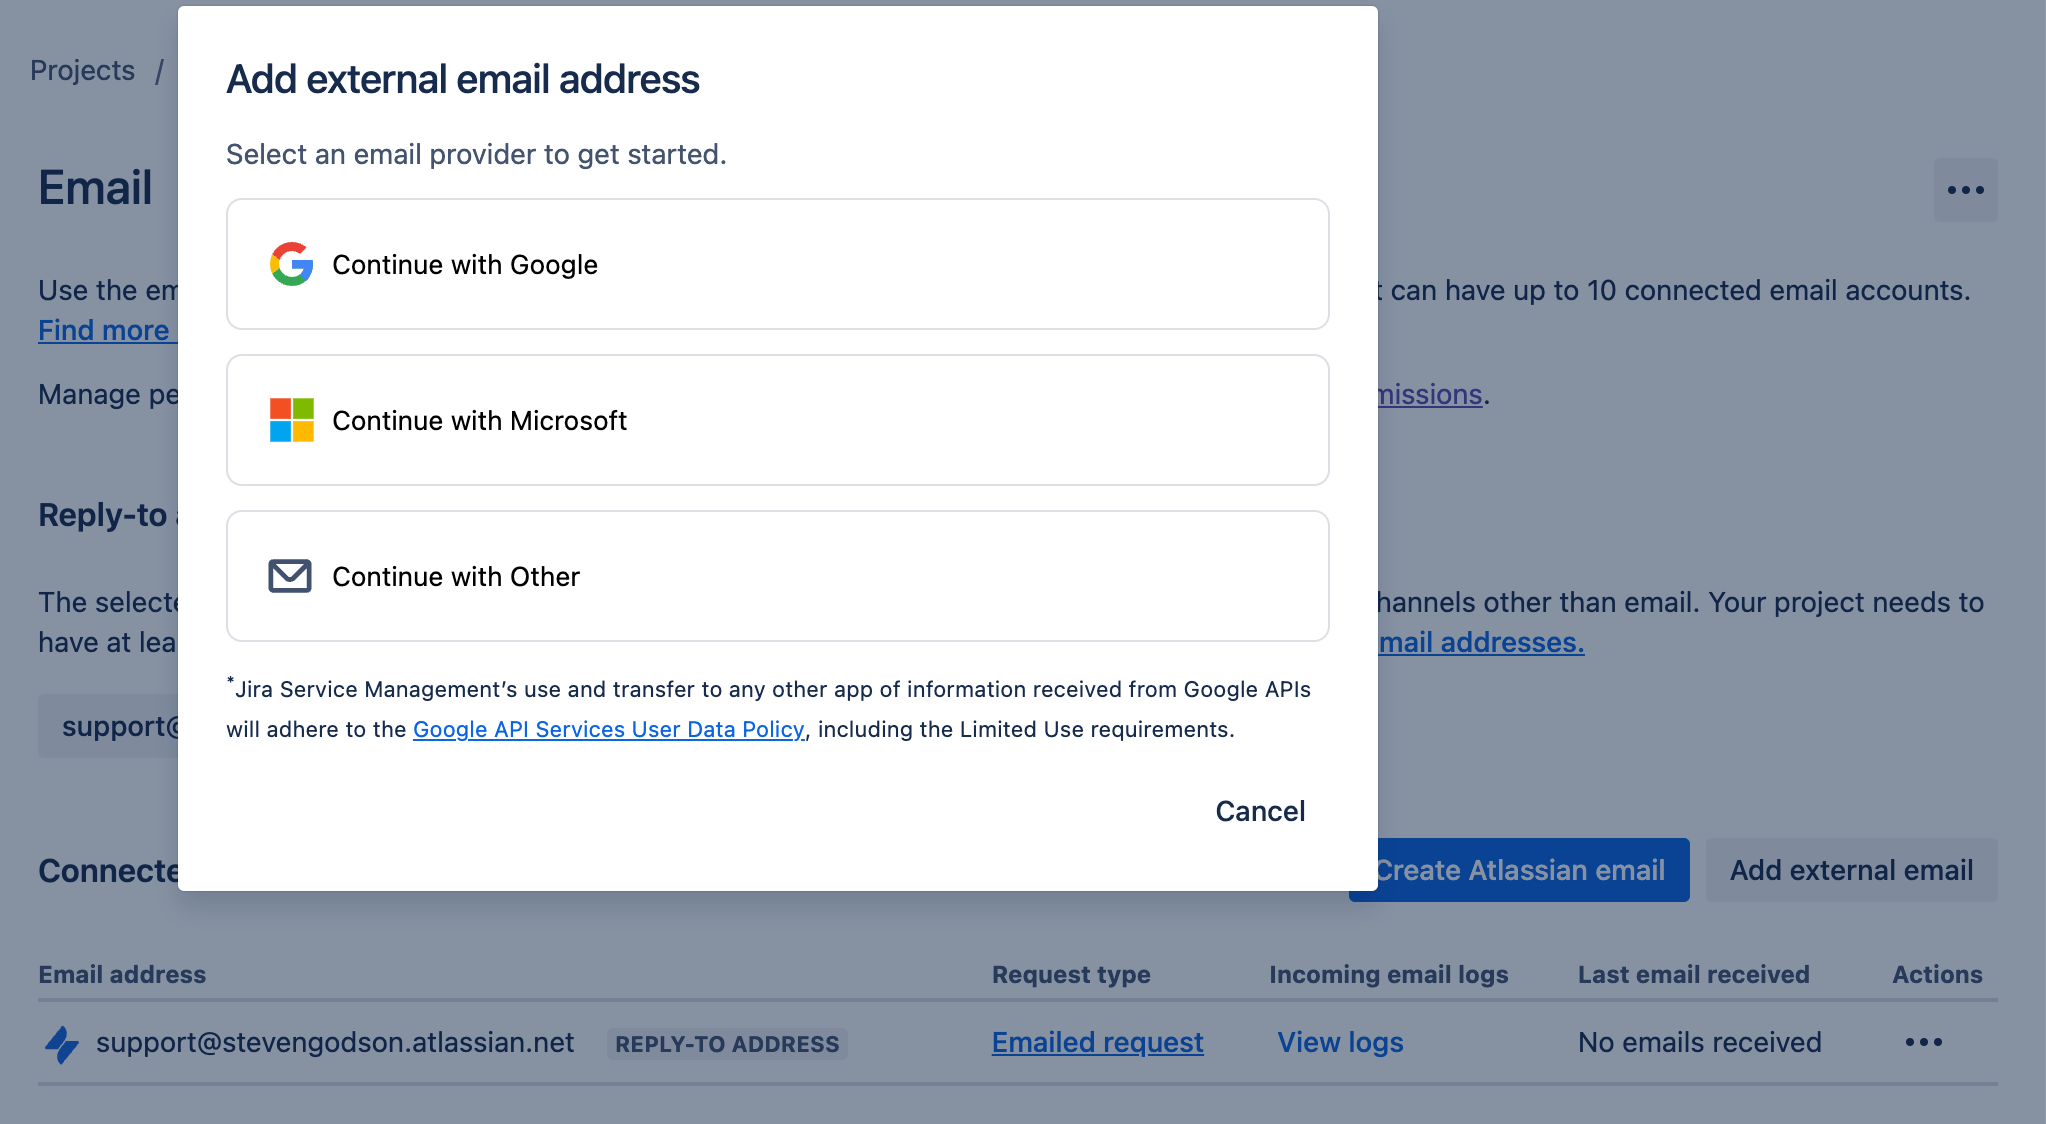
It is also possible to link external emails to your project, useful if you want to keep a corporate “feel” to the service desk. Simply click on the Add external email button, select the option that fits your use case and follow the instructions to connect to your email provider.
Chat
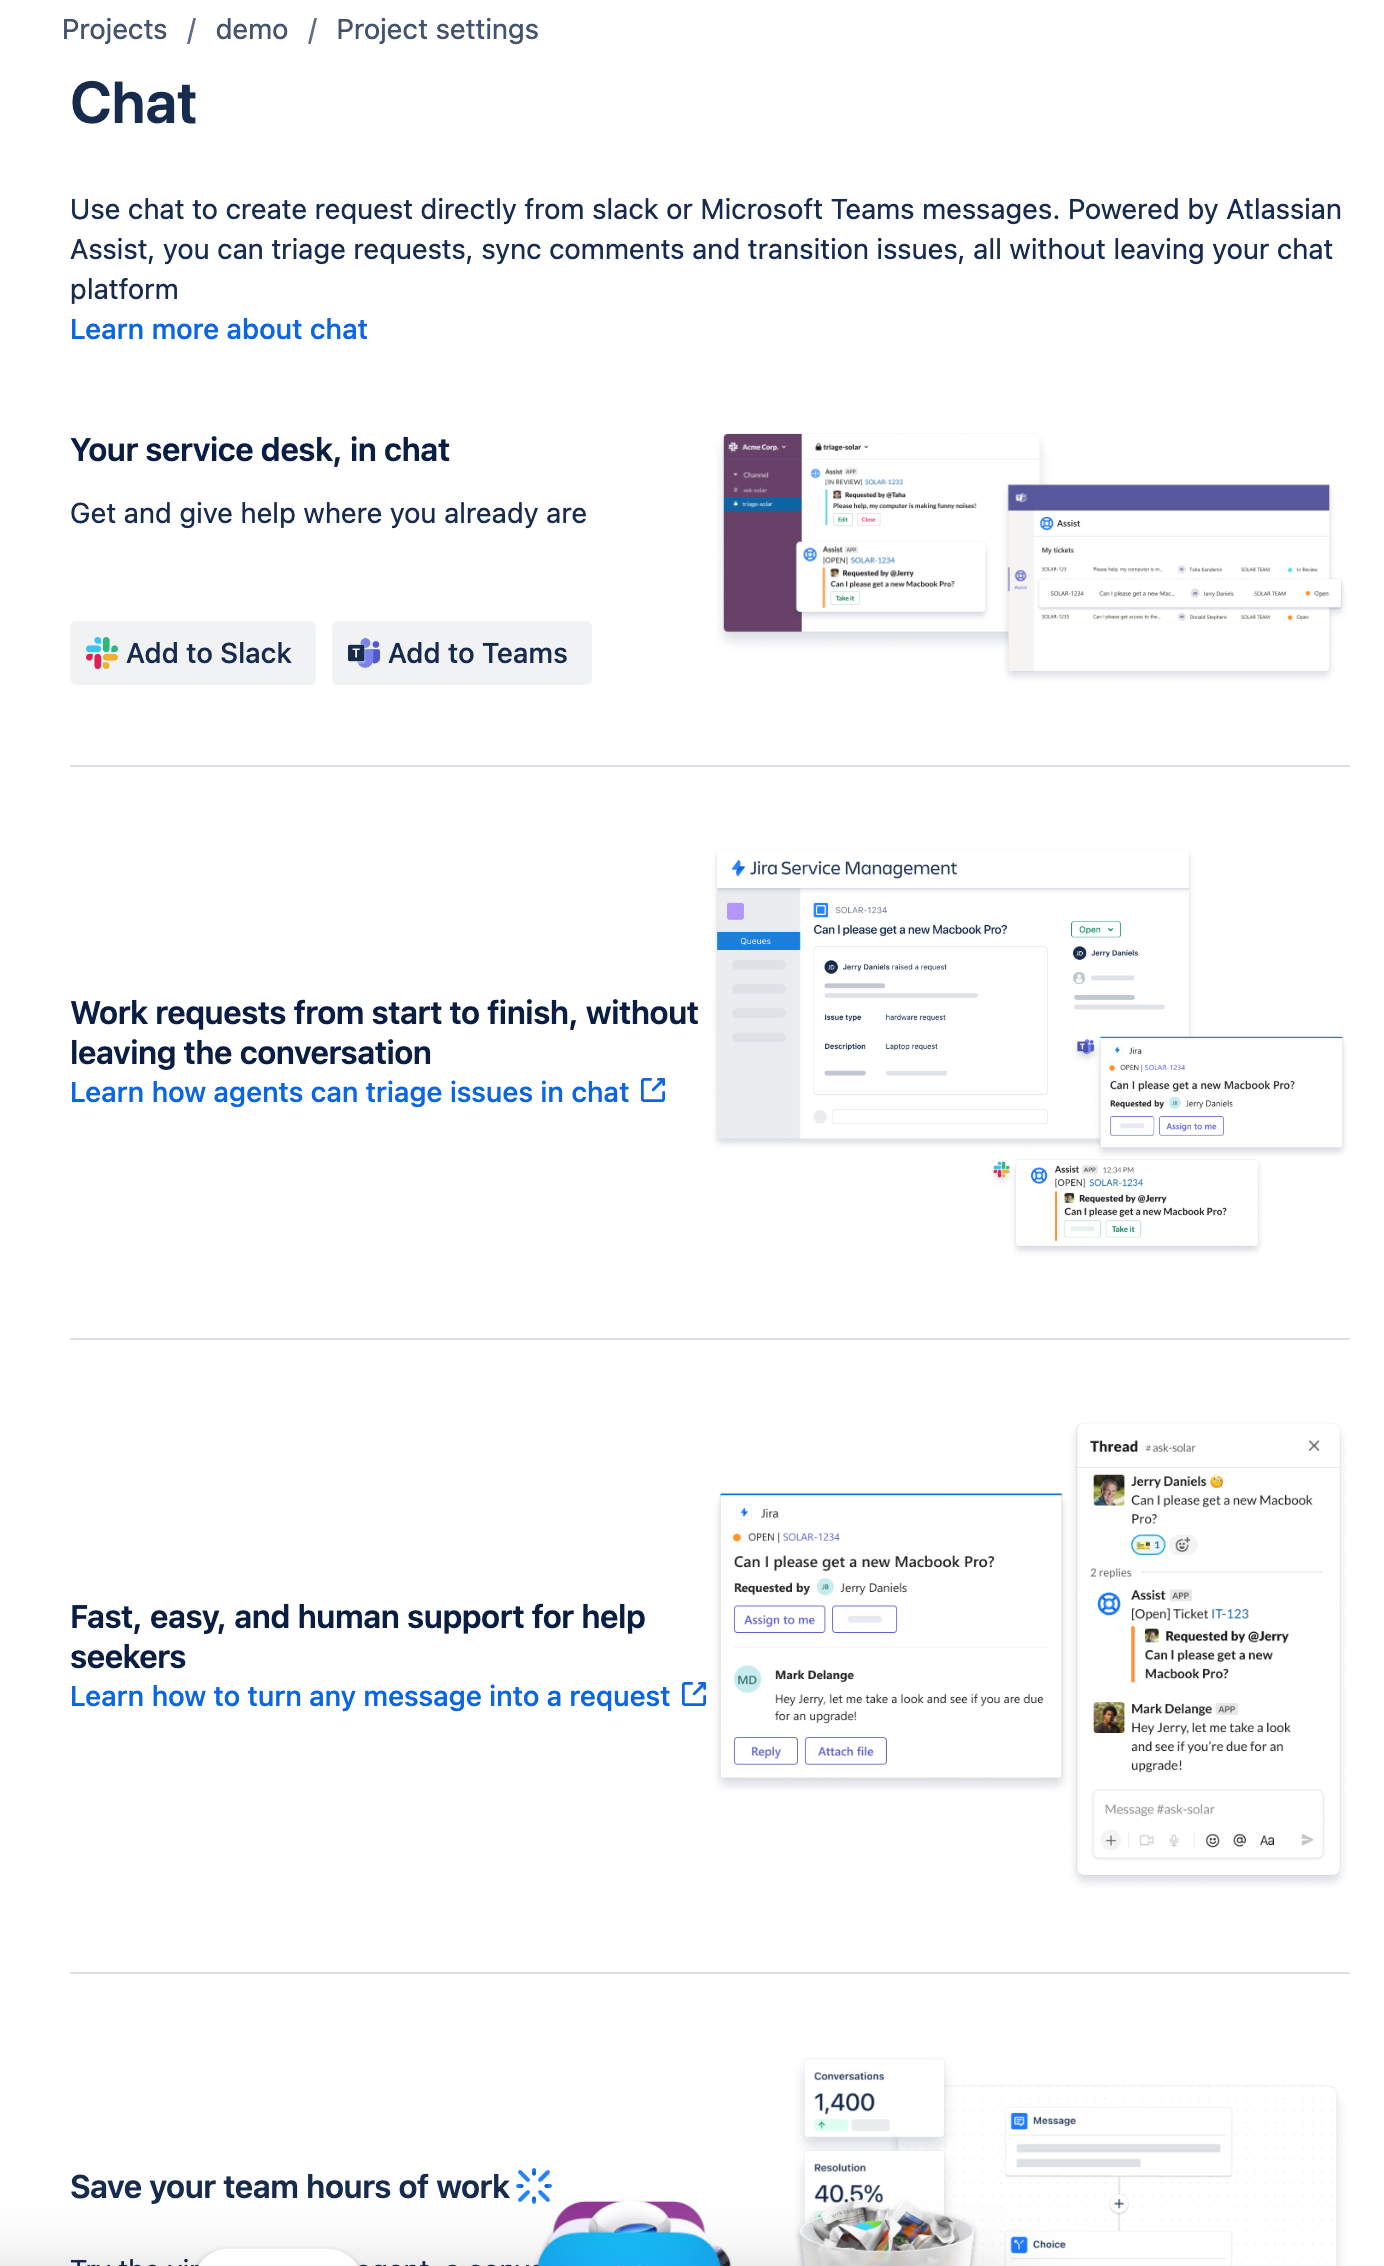
The chat options of JSM are shown as four streams.
- Integration - with Slack or Teams to give a more integrated feel to the customer experience, crucial in a world where Experience Level Agreements (XLAs) are ever pushing their way into the foreground of CIO thinking
- Workflows - seamless fulfilment of requests within the chat
- Chat to Request - including triggers within a chat to allow agents to generate request records from a chat message
- Virtual Agent - the ever ubiquitous use of AI and Machine Learning to support customers through automation and knowledge bases
Collect Relevant information with request types
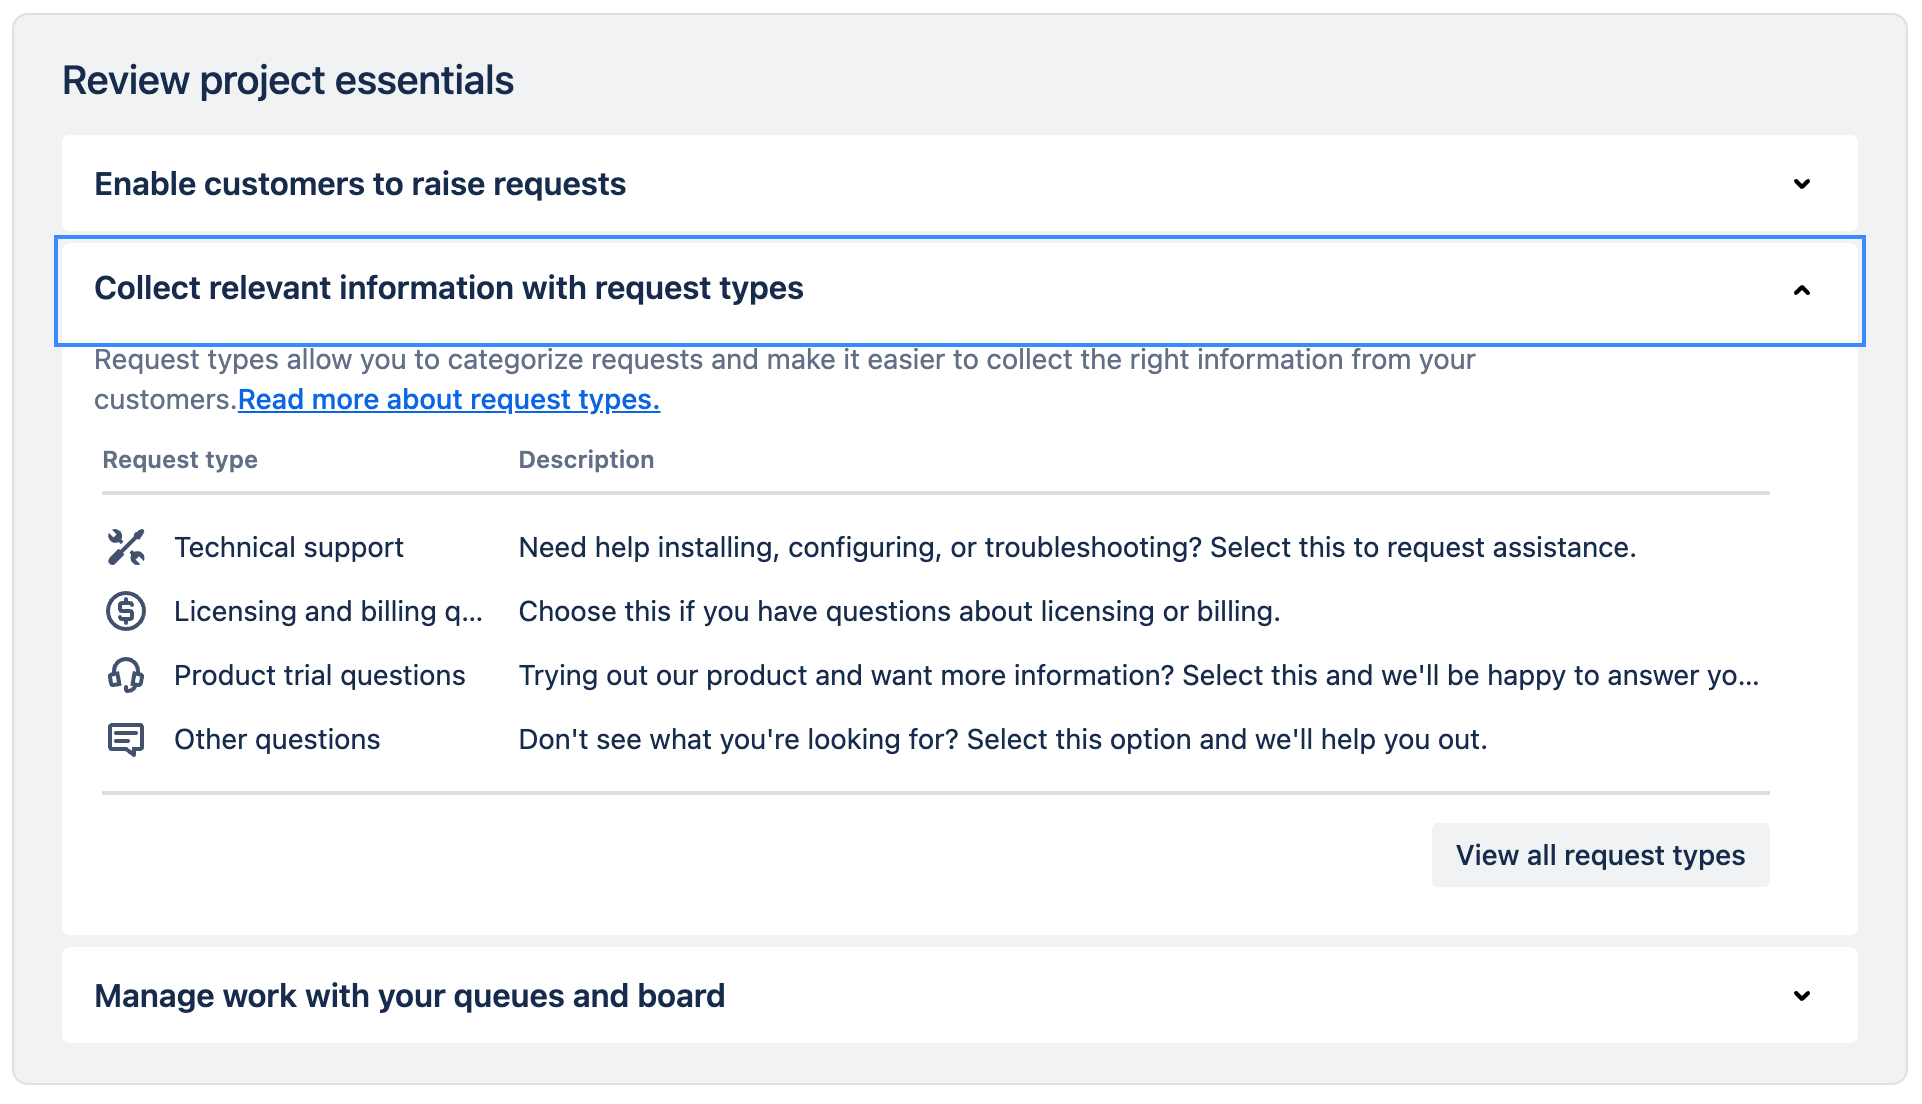
This section of the Getting Started page is really just a prompt for you to think about what information you want to capture in the forms for the various request types. Clicking on the View all request types button takes you to the Request types section of Project settings.
I will be covering all of the options in Project settings in the next JSM article, so we will move on to the next section.
Manage work with your queues and board
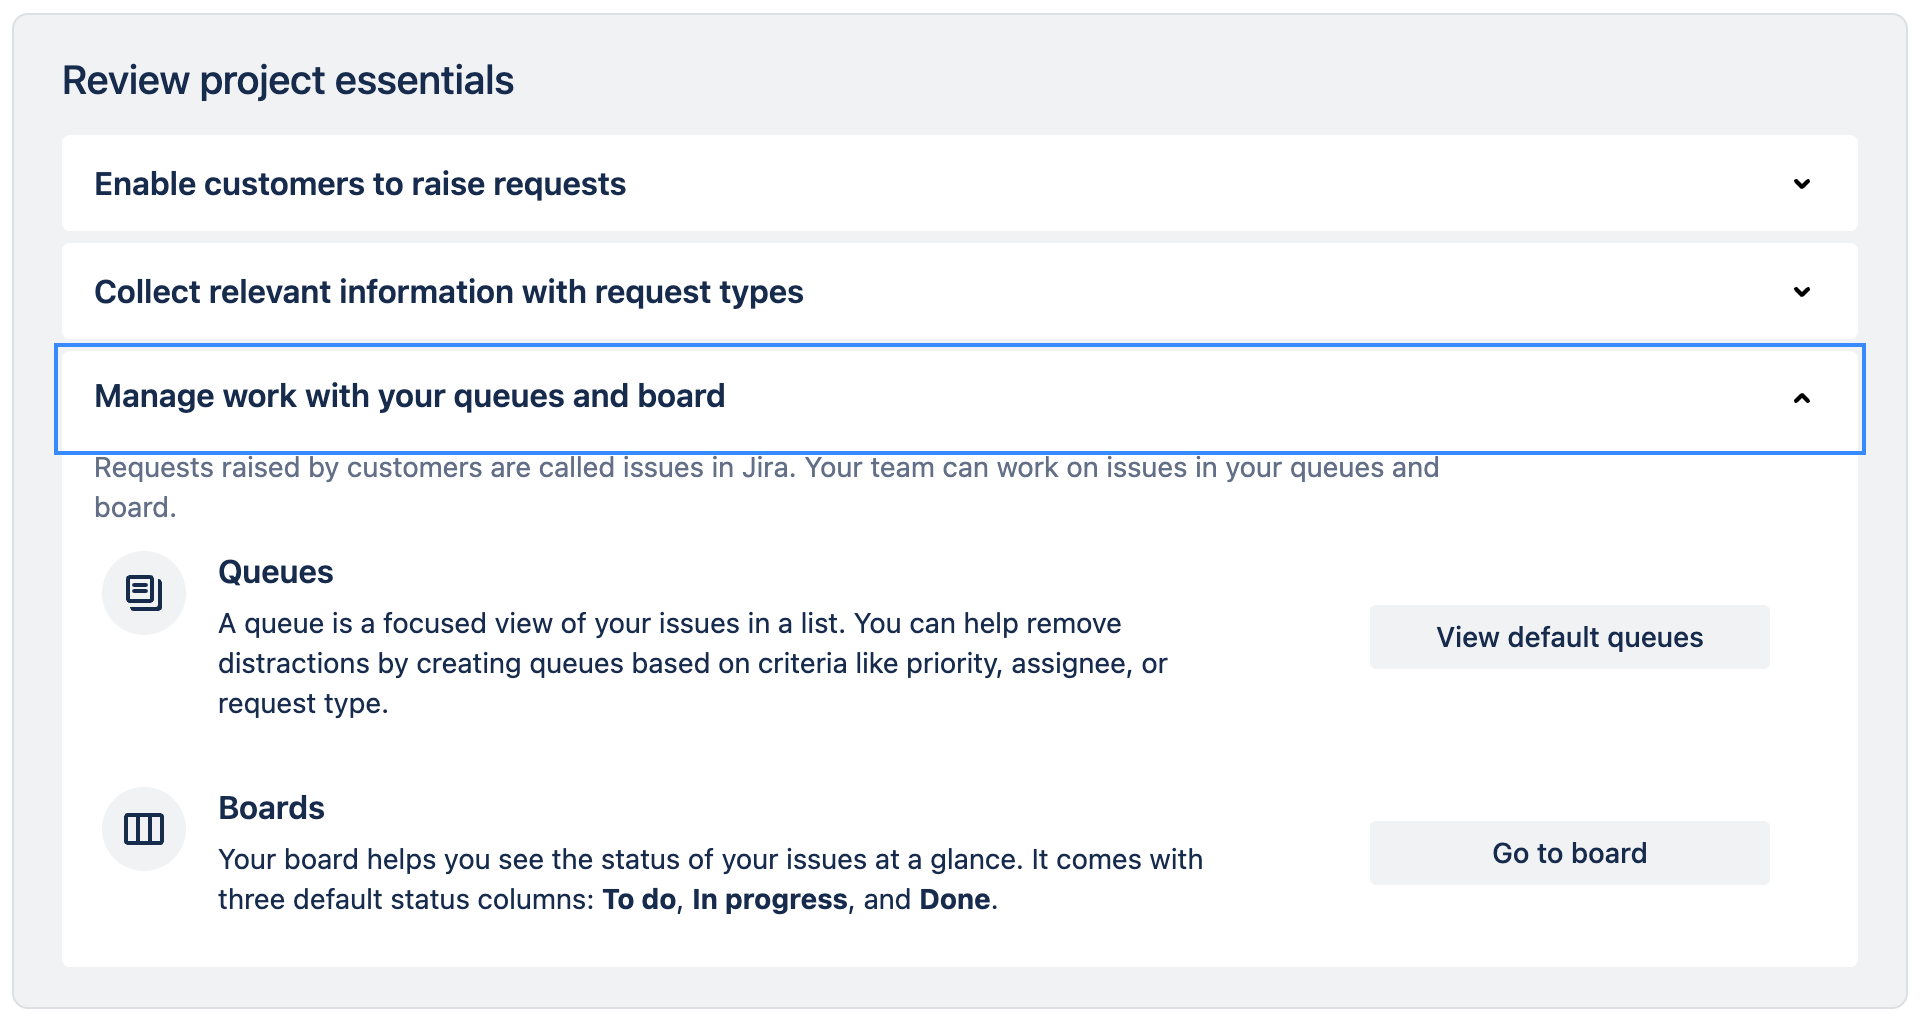
Both Queues and Boards (now known as Views) are basically ways of view the different tickets yours service desk has open. These can be cut numerous ways depending on how you want to see the information. Both of these take you to the relevant project sections where, assuming you have Admin permissions, you can manage the queues and views.
I will be covering both of these in the third JSM article.
Conclusion
We have come to the end of the first article in this series. We have explored what JSM is, how to initiate a project and gone through the basic options in the Getting Started feature.
In the next article we will be going through all of the Project settings options to discover just how versatile JSM can be.
Hopefully this has been useful to you and I wish you well on your ITSM journey…